Do you want to Connect WordPress Form to Google Sheets?

Connecting WordPress form to Google Sheets will be beneficial for many reasons. You can easily connect your form with Google Sheets without any coding knowledge. It helps to simplify your workflow.
In this tutorial, I will provide complete step-by-step guidelines about how to connect WordPress forms to Google Sheets with some technical knowledge.
So without wasting time, Let’s begin.
Also Read: How to integrate WordPress live chat into your website?
Why do we connect WordPress form to Google Sheets?
We can connect WordPress forms to Google Sheets for many reasons. Basically, the WordPress form sends the submission data to Google Sheets if we connect. Using this, we can make our workflow easier.
Google Sheets provides a centralized location to collect and store form submissions. If we connect WordPress form to Google Sheets, it will be easy to access, manage, and analyze.
Integrating Google Sheets to WordPress form, you will get new submissions to Google Sheets. It also works as a backup of your form submission.
On the other hand, Google Sheets is a collaborative platform that allows multiple users to work on the same document simultaneously. So it will be helpful for teams that need to collectively manage and analyze form data.
You can also set up any automation using your submission data. This also helps you with Analysis and Reporting.
Also Read: How to connect MailChimp to WordPress?
How to Connect WordPress Form to Google Sheets?
Connecting your Google sheet to WordPress will be beneficial. Here I will use the Forminator form plugin because we already have the plugin on our site. For integration with Google Sheets, we will use the Bit Integration plugin.
By default, Forminator offers Google Sheet integration system but I use the Bit Integration plugin so that you will know the method and will able to integrate any form plugin. Now let’s go start the integration.
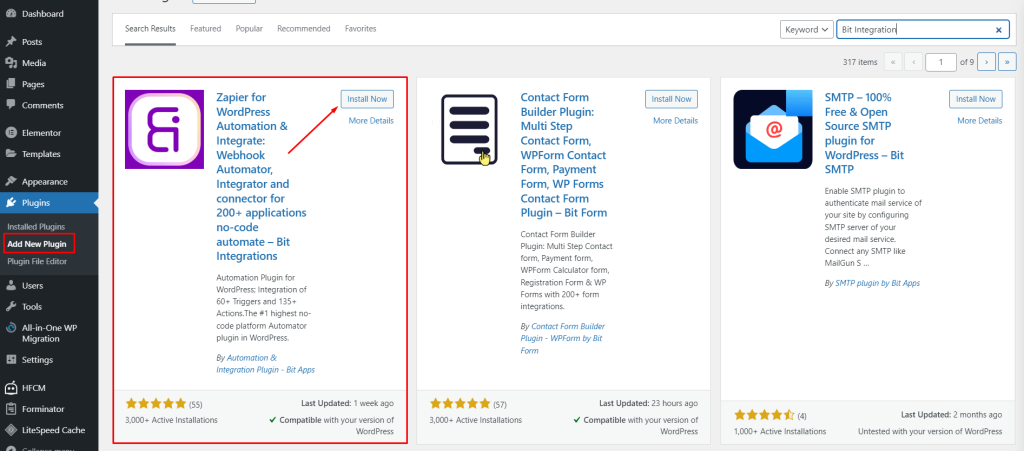
Step 1: Installing Bit Integration Plugin
Go to WordPress Dashboard >> Plugins >> Add New Plugin. Now search for Bit Integration in the search field at the top right. Now Install and Activate the plugin.
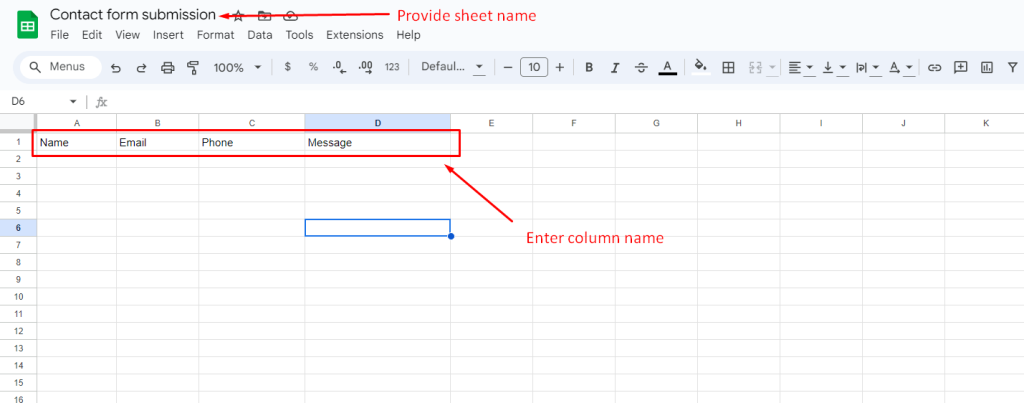
Step 2: Create a Google Sheets
Now go to Google Drive and create a Google sheet. After opening Google Sheets, provide the name of the Sheet and create a header. Don’t worry, the header means column names that are on your form fields. If you just need to add any specific data from your phone like Name, Phone, Email, etc, you can just enter those field names.
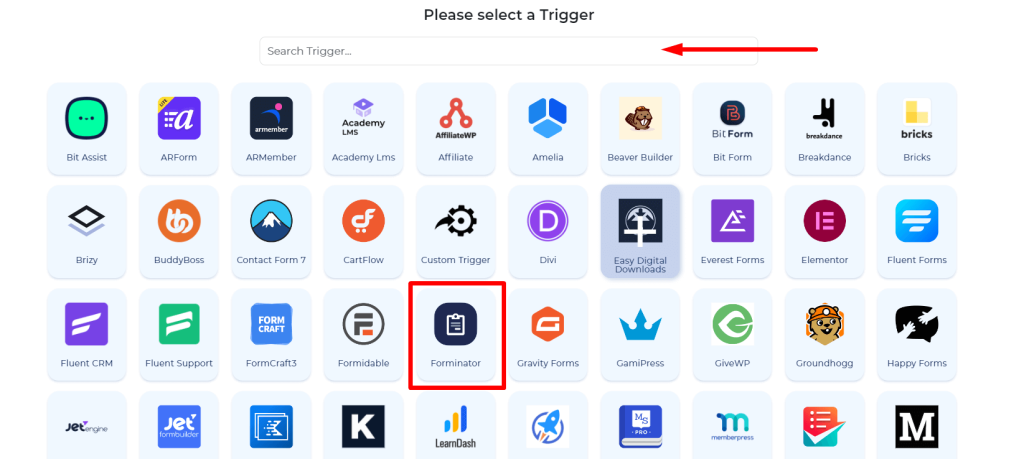
Step 3: Integrate Google sheet into the website form
To start integration, go to WordPress dashboard >> Bit Integration >> Create Integration.

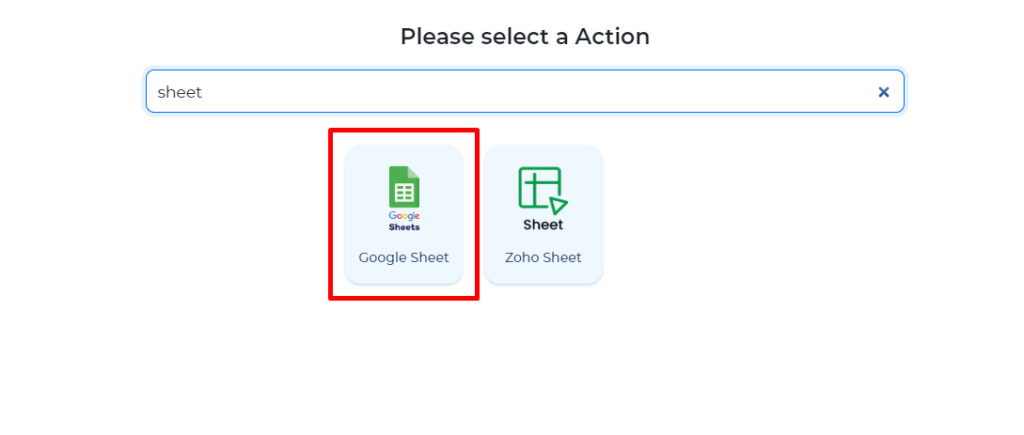
Now select the trigger. Here I use Forminator form. If you use other form plugins, select it. After selecting the trigger, select the task or form and Google Sheet as an action.
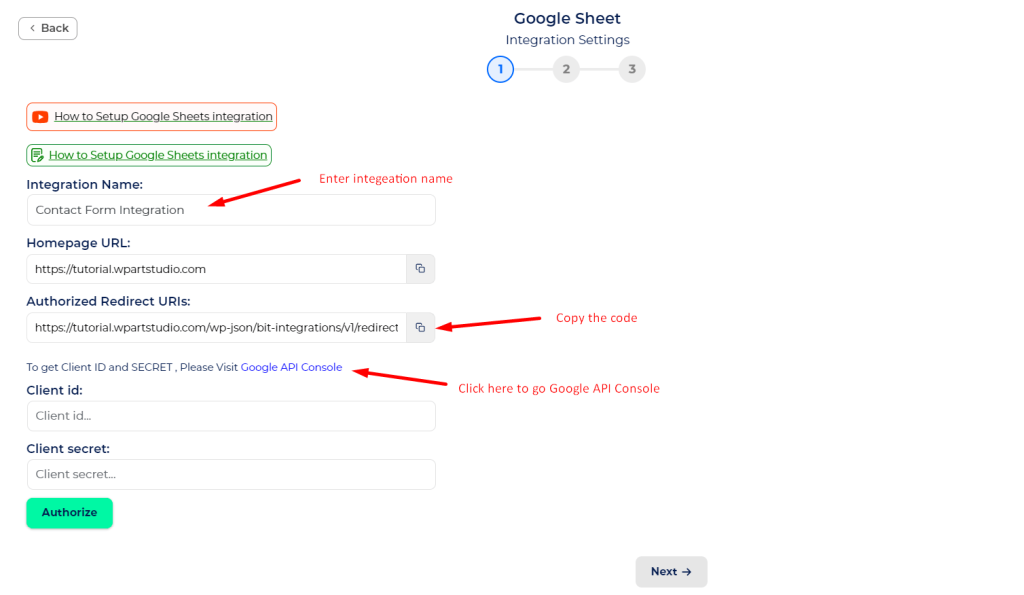
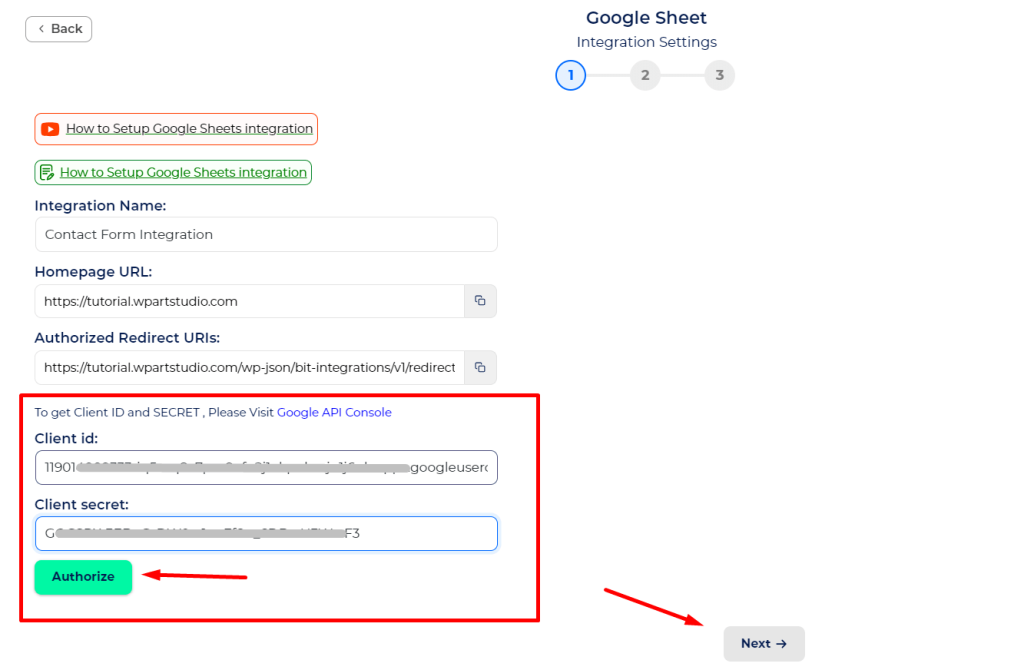
After redirection, you need to provide some information like Integration name, Client ID, Client Secret, etc. So, provide the integration name and copy the Authorized Redirect URL and let’s create Client ID and Client Secret.
Step 4: Creating Client ID and Client Secret
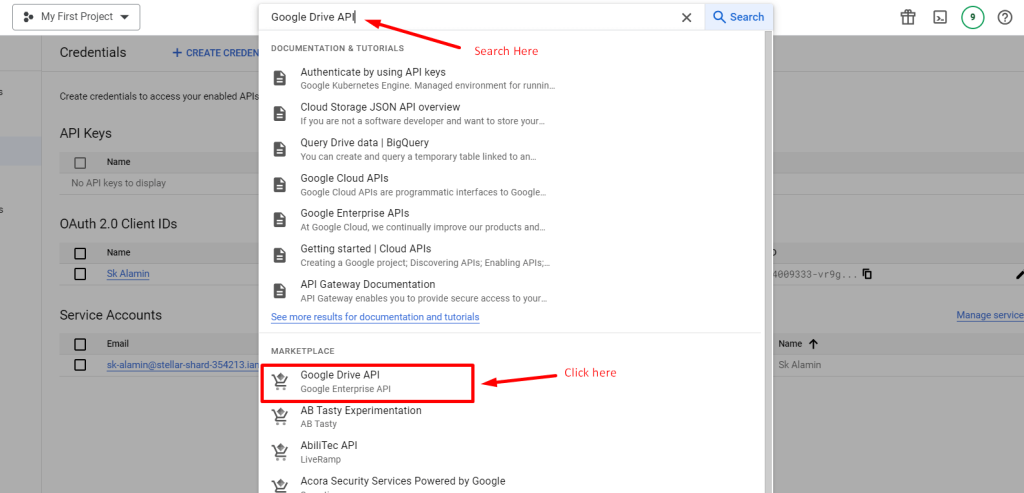
Go to Google API Console. You will get the link on integration settings or search on Google. Select your Google account that was used during creating the Google Sheets. Now search for Google Drive API and enable it.
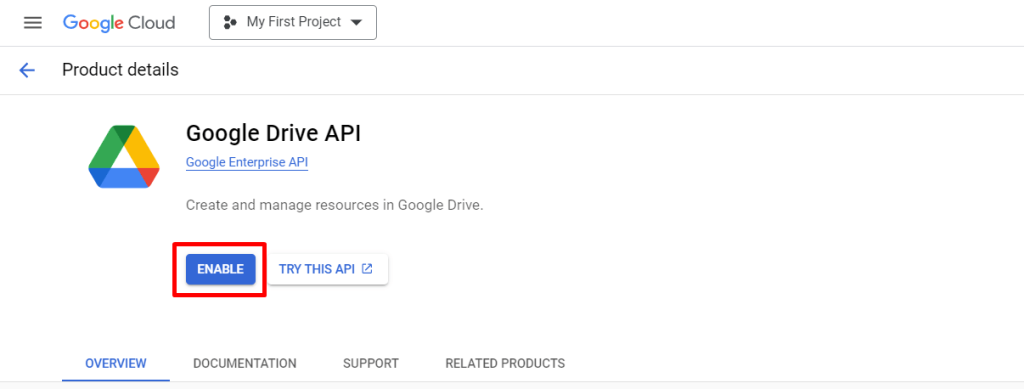
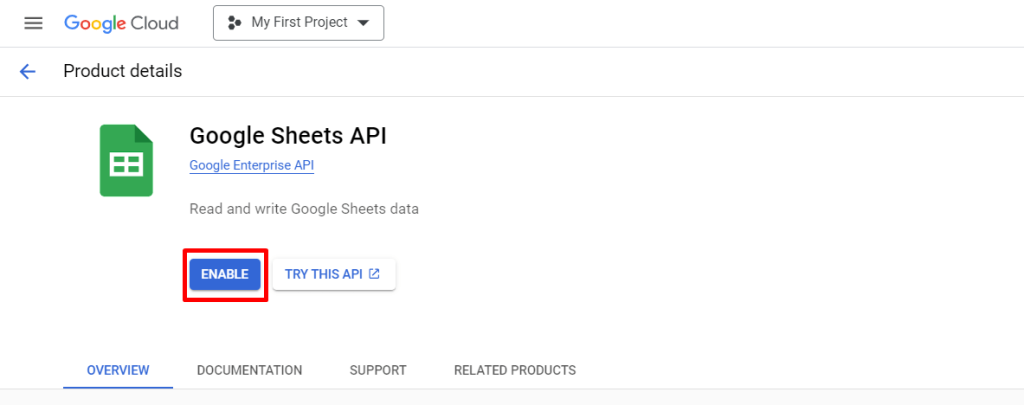
After enabling Google Drive API, search for Google Sheets API and enable it.
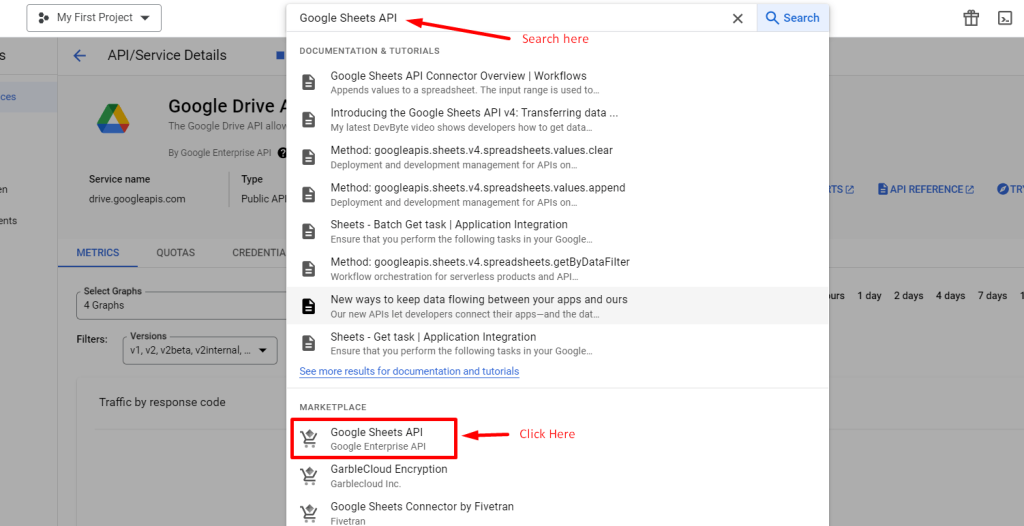
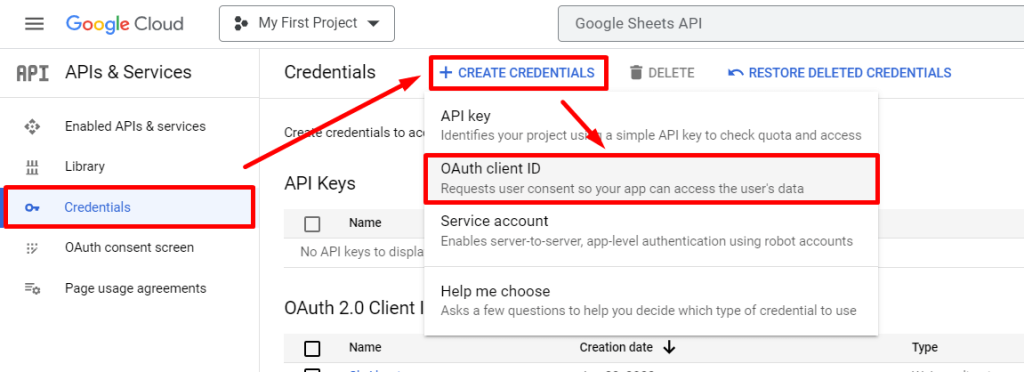
Now click on Credentials >> Create Credentials >>OAuth Client ID. You will be redirected.
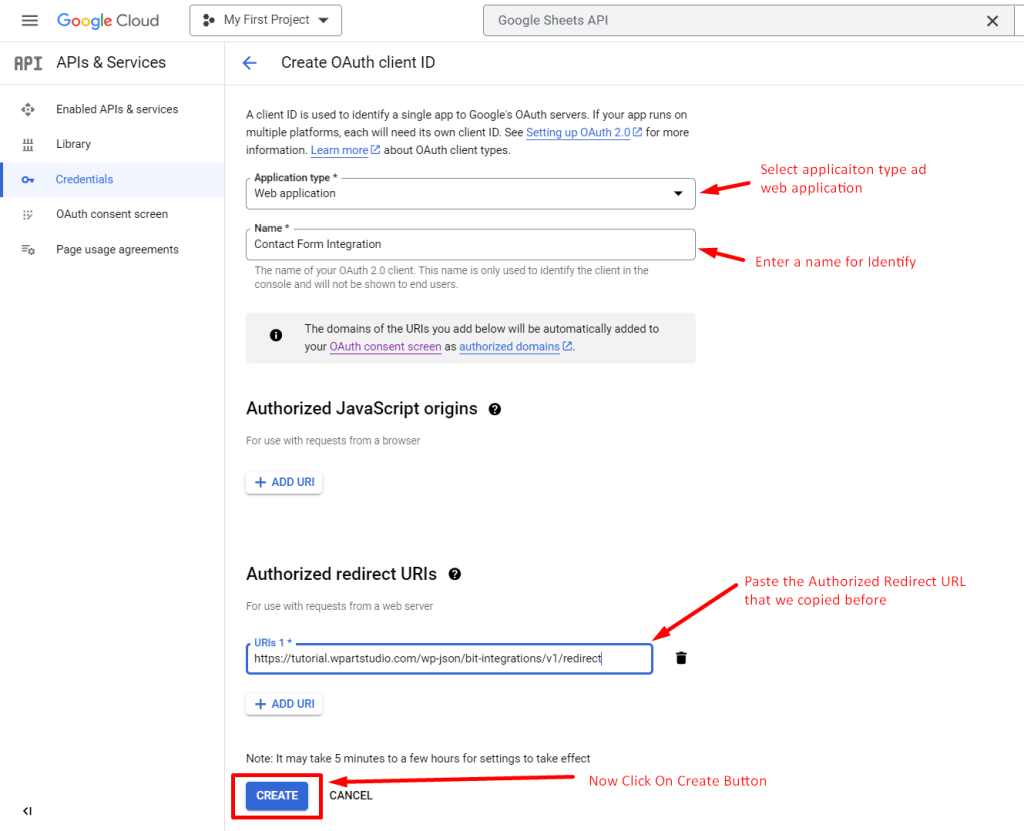
Select Application Type as Web Application, provide a Client ID name for identification, Paste the Authorized Redirected URL that we copied before, and click on Create Button
Step 5: Finish the Integration and test it.
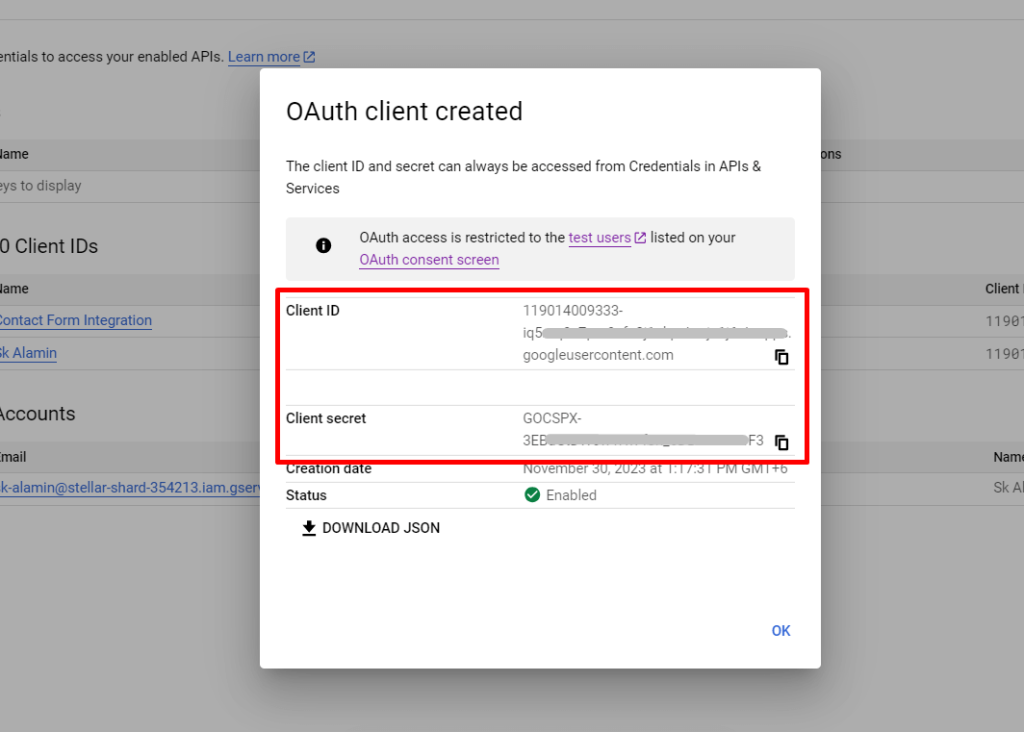
You will get a popup with Client ID and Client Secret. Now copy the Client ID and Client Secret and paste them to Integration settings and click on the Authorize button.
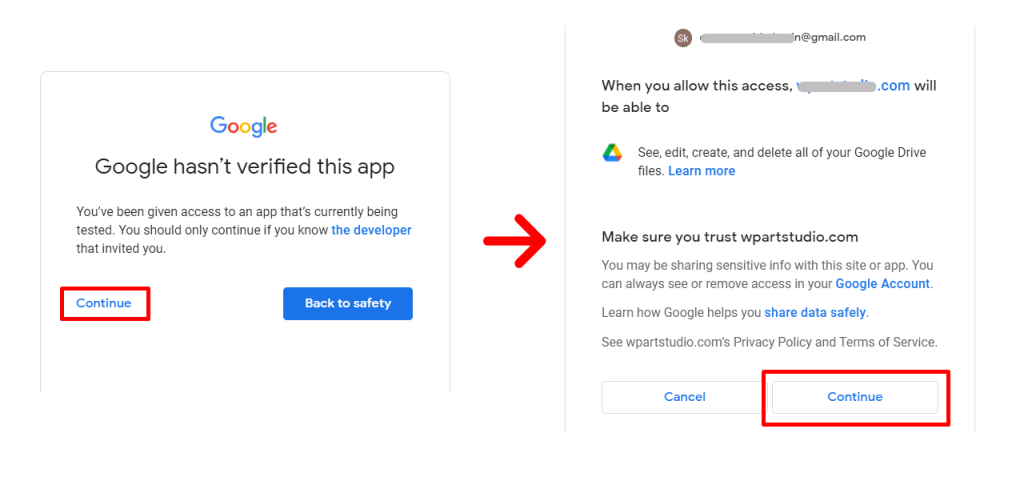
Now choose the Gmail account that you used to create the OAuth client ID and your Google Sheet. Click on Continue and again Continue. Now you will see a successful message and click on the Next button

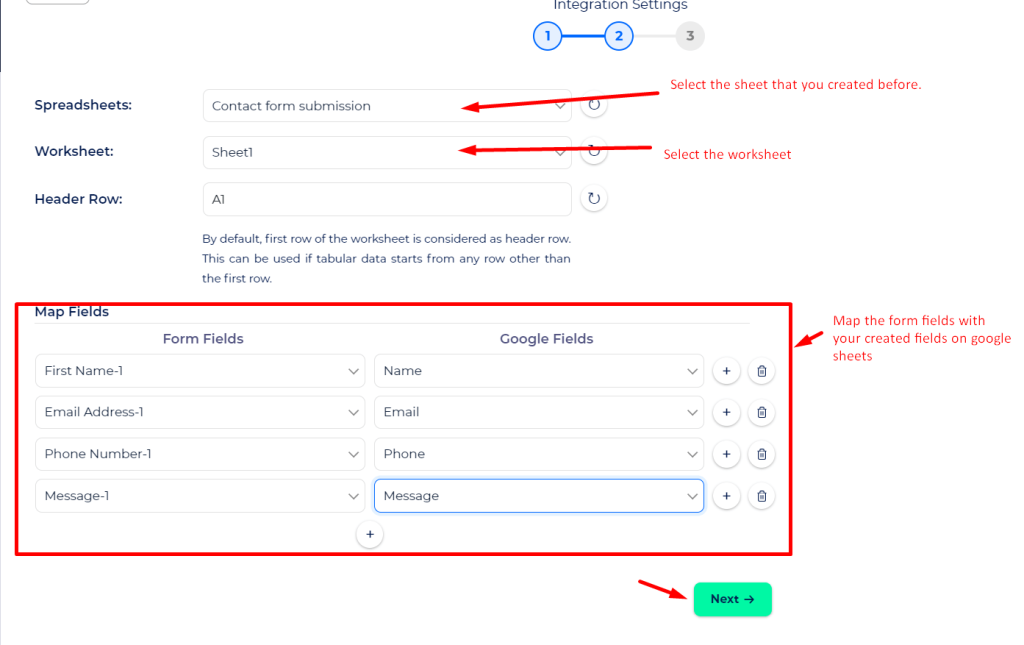
Now select the Google Sheets that you created before and also select Worksheet. Now you need to map the form fields with your sheets field that you created before. Once done, Click on Next >> Finish and Save.
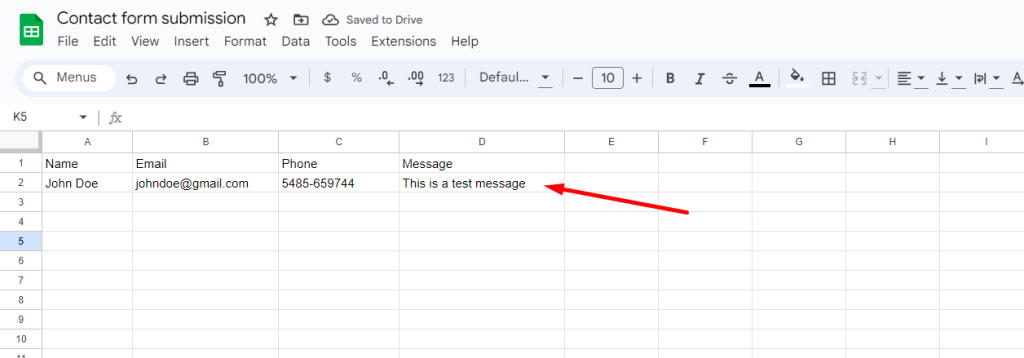
So, our integration was successful. Now let’s try the form submission. You can see below our form submission goes to our Google sheet successfully.

Also Read: How to set up WordPress SMTP Plugin? Complete Guideline in 2023
Conclusion
Connecting any form to Google Sheets is easy using the Bit Integrations plugin. By default, Forminator offers some integration including Google Sheets but I used another plugin here because if you do not use Forminator so that you can know the method.
If you want to use Forminator’s default integration system, you can use it easily because the process is same. You do not need any other plugin.
Integrating WordPress form to Google Sheets is important and helps to ease your workflow. You can also use the google sheet for automation. You can also add your team members to manage the sheet at a time.
So I hope you read the full article and are able to integrate Google Sheets into your WordPress form. If you face any issues while integrating the Google sheet, let us know. We will provide the solution. Continue reading more articles from our blog.