Looking for the best guideline to connect MailChimp to WordPress?

To grow a website visitor or sales, marketing is very important. There are many ways to marketing your site and email marketing is the best way to get more visitors and sales.
There are many email marketing companies available but Mailchipm is very popular. If your site runs on WordPress and you want to integrate MailChimp into your website, yes you can do it easily using a plugin.
In this tutorial, I will show you step-by-step how to connect Mailchimp to WordPress website. So without further ado, let’s get started.
Also read: 8 Best Free WordPress Form Builder Plugins
Why connect MailChimp to WordPress?
Mailchimp is a very popular email marketing platform that allows the website owner to grow mailing list and send emails easily within a moment. There are many reasons to connect MailChimp to your WordPress website and some key reasons are:
Growing Email List: Mailchimp with WordPress integration allows you to create various opt-in forms, such as pop-ups, embedded forms, and subscription forms that capture visitors’ email addresses. You can easily place those forms on your website to grow your email list.
Seamless Email Marketing: By connecting Mailchimp to your WordPress website, you can easily manage and automate your email marketing campaigns. You can create and send professional-looking newsletters, product updates, and promotional emails to your subscribers directly from your WordPress dashboard.
Targeted Email Campaigns: With Mailchimp’s powerful tagging features, you can create targeted email campaigns based on user preferences and behavior. MailChimp scans user data, such as names, email addresses, and even custom fields, to Mailchimp, enabling you to send personalized and relevant emails to different segments of your audience.
Automation and Triggers: Mailchimp offers robust automation features that allow you to set up automated email sequences triggered by specific actions or events. By connecting Mailchimp to your WordPress website, you can trigger these automation workflows based on user interactions.
Also read: How to create contact form in WordPress?
How to connect MailChimp to WordPress?
Connecting MailChimp to WordPress is an easy process. You can connect MailChimp to WordPress just following some steps:
Step 1: Create a MailChimp account.
To get MailChimp marketing service, we must need a MailChimp account. If you have already an account, you can simply generate an API by logging in MailChimp site. Here I will show you all the processes from creating an account to generating an API key.
To create an account, go to https://mailchimp.com/ and click “Sign Up” button at the top right.

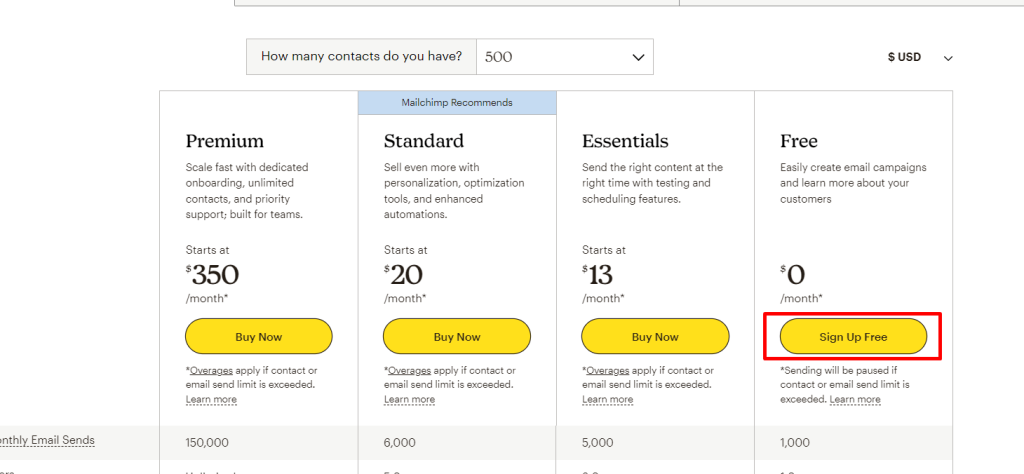
You will be redirected to the pricing page and will see some packages and details. If you need any premium pack you can simply buy from there but here I will show you using the free plan. So click on the “Sign Up Free” button.
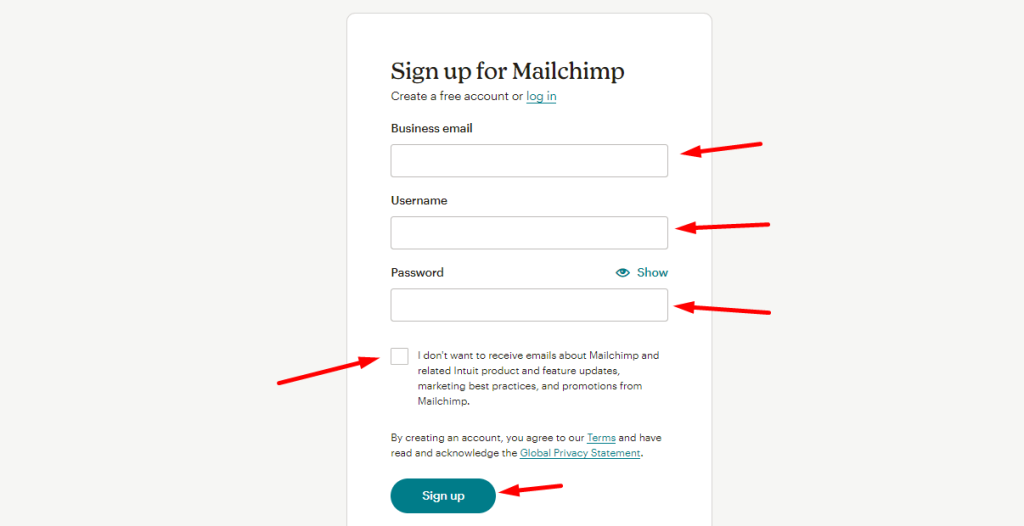
You will see a Signup form. Now provide the details and click on Sign up. If you already have an account, simply log in there.
After clicking on “Sign up” button, MailChimp will send an account Activation mail to your Gmail. So, go to your Gmail account and check the mail to Activate your account.
After activating the account you will see the pricing plan again and if you need any subscription plan you can buy from there or click on the “Continue Free” button. Now the account setup page will display and you need to provide all the information. All the steps are easy that’s why I skip those here.
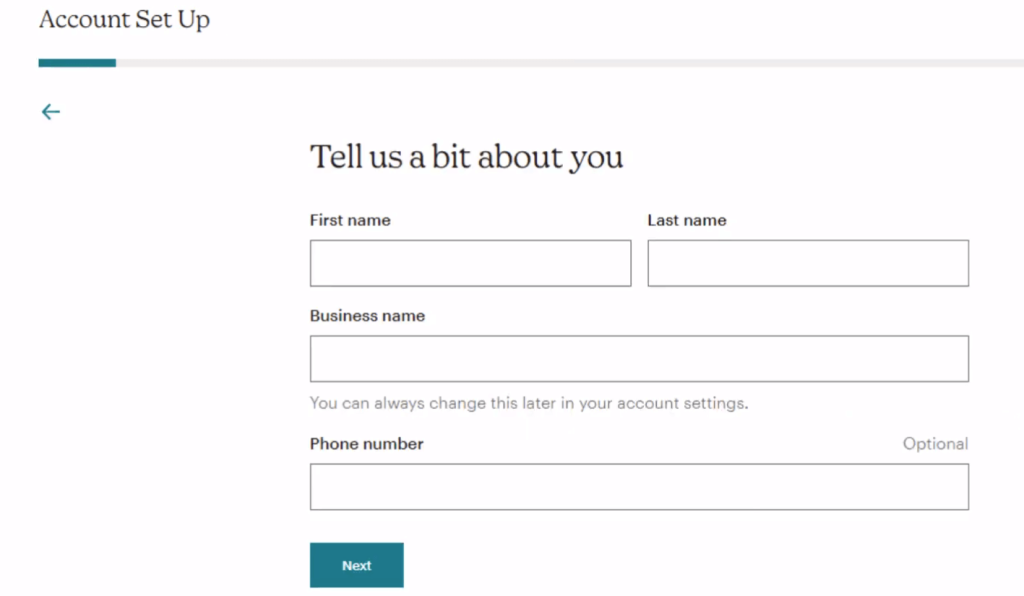
After providing all the account details, you will be redirected to your MailChimp account dashboard and you will manage all activity from there.
Step 2: Create a MailChimp API
Now let’s see how to create a Mailchimp API for our site.
First, go to your MailChimp account. You will see the account “Avatar” at the top right and click on it. Now go to Accounts & Billing.

Now go to Extras → API Keys.

Scroll down and click on Create A Key. Now provide a Key label and click on Generate Key.
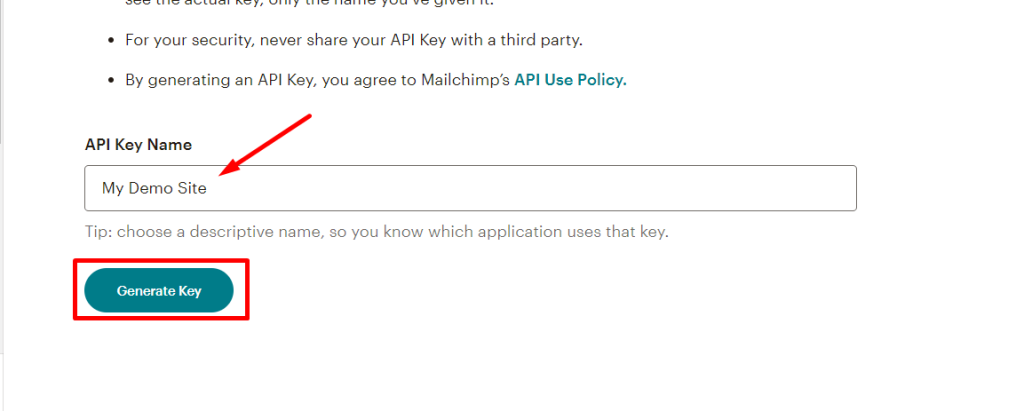
Now Copy the key and click on Done.

So we successfully generate our API key. You can save the key in a secure file.
Step 3: Install the plugin and connect MailChimp to WordPress website.
To connect MailChimp to the WordPress website, go to your WordPress Dashboard → Plugins → Add new. Now search “Mailchimp for WordPress” in the search field. Install the first plugin and Activate it.

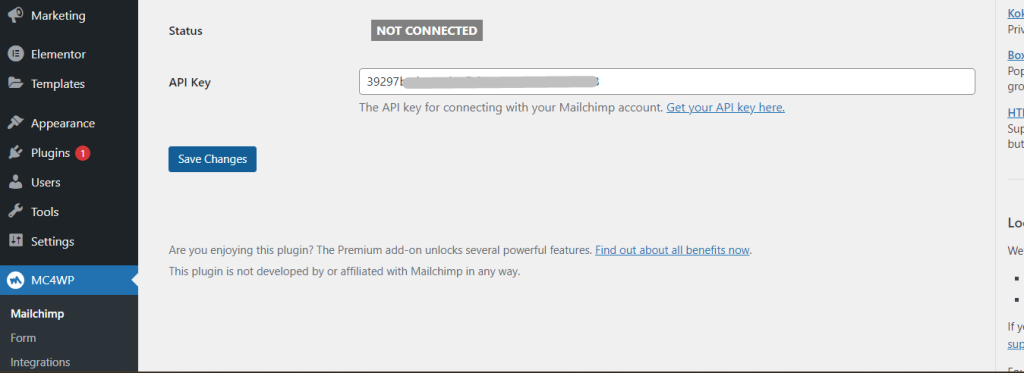
After activating the plugin, you will see a new tab on the left side called “MC4WP” and click on it. You will see a field to provide the key. So paste the key that you copied before and click on Save Changes. After saving you can see your site connected to MailChimp.
Step 4: Creating a MailChimp form
To create a MailChimp subscription form, Go to MC4WP → Forms. Now enter the Form title and select the subscriber list and click on Add New Form.
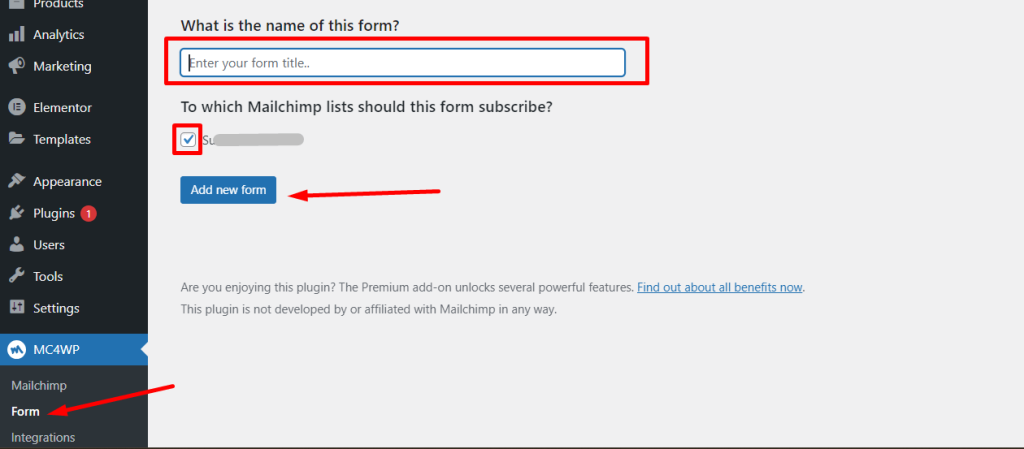
Mailchimp automatically create a basic form but you can add more fields. Now copy the shortcode and click on the save changes button below.
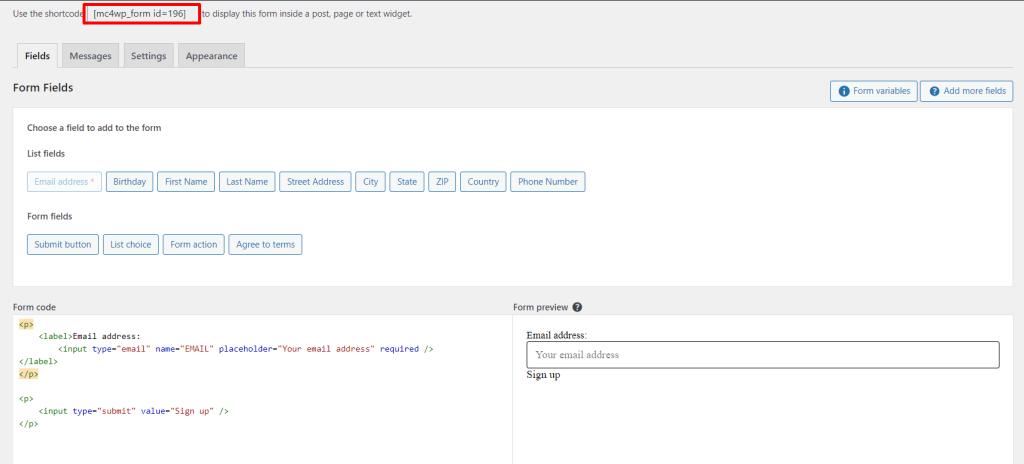
Now you can use the shortcode anywhere on your website where you want to display the form.
Also read: Top 5 Google Reviews WordPress Plugin
Conclusion
Mailchimp, a leading and popular email marketing service provider, offers a range of features such as customizable templates, automated workflows, and robust analytics. It allows website owners to build and maintain their subscriber lists, design visually appealing emails, and track the performance of their campaigns. With Mailchimp’s extensive tools and resources, businesses can effectively engage with their audience and drive conversions.
Integration between Mailchimp and WordPress offers a powerful solution for businesses and individuals looking for easy email marketing efforts. By connecting these two platforms, website owners can leverage the strengths of both to create and manage effective email campaigns.
Connecting MailChimp with WordPress is easy. I hope you will easily connect them by following the steps above. If you face any problems, don’t forget to leave a comment. Continue reading other articles from our blog page.