Building a website using WordPress is easy now. It offers a user-friendly dashboard and the availability of thousands of themes and plugins. If you are a beginner and want to build a website using WordPress, this article is really helpful to you. Here I will show you the process step by step on how to build a website using WordPress.
First of all, we need to purchase a domain and hosting server to build the website. It is very important to choose the best domain name that is suitable for your website goals. Besides, you need to select a hosting that fulfills your needs. I already published an article on how to choose the best domain name and hosting plan. You can read it.
If you purchase the domain and hosting from a different company you need to connect them first. You will get complete guidelines on how to connect the domain with hosting here.
After purchasing a domain and hosting you need to know how to install WordPress on your live server. You can also read our article on how to install WordPress on a live server.
I hope you installed WordPress on the live server and now I will discuss step by step how to build a website using WordPress. So let’s dive in deep.
How to build a website using WordPress?
Before start building the website, first we need to log in website dashboard. You can easily go to your dashboard by the link below: “https://yourdomainname.com/wp-admin”. After going to the URL, you need to provide your website username and password. I hope you successfully logged in to your website. Now follow the steps:
Step 1: Customize general settings
Before building a website general setup is essential. For this, you need to know about Dashboard and If you are not familiar with WordPress dashboard, I will recommend you to see the post first : WordPress Dashboard Introduction
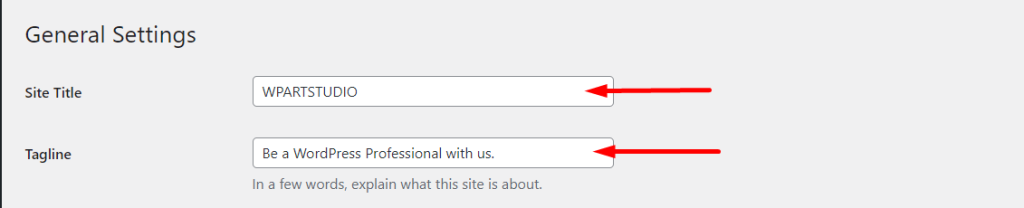
Set your website title and tagline
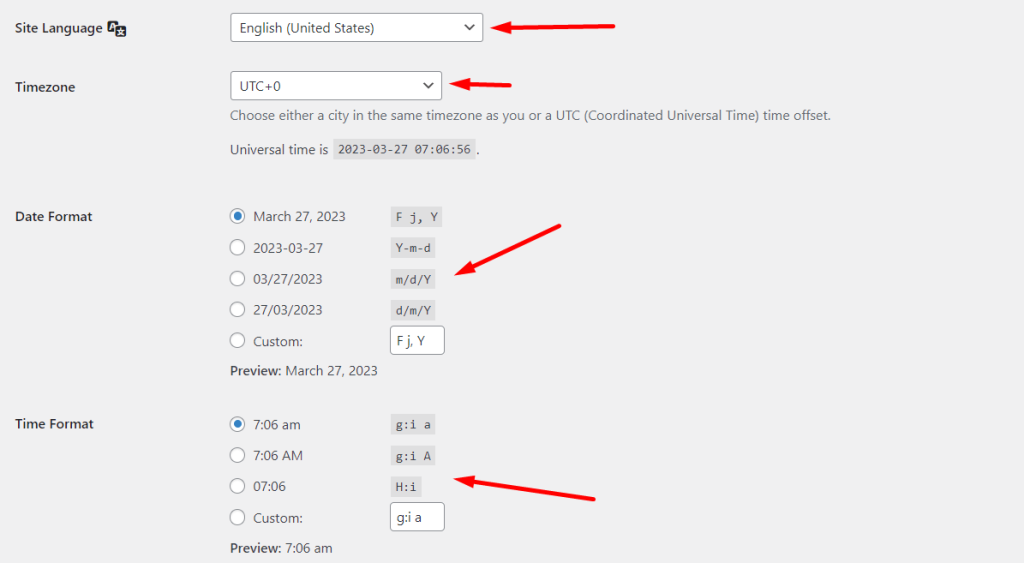
Go to Settings → General. You will see fields to change the website title and tagline. If you want to change language, timezone, date, and time format, you can do it from the page bottom.
Make your site public
To publish your website on the internet, you need to give google indexing access. So, go to Settings → Reading → uncheck the Search engine visibility option. If you check this option, your website will not be indexed on google.

Set permalinks
Changing WordPress permalinks can be necessary for several reasons, such as improving SEO, making URLs more user-friendly, or reflecting changes in the site’s content structure. In short, it can help improve the overall user experience and search engine visibility of your website.
To change permalinks go to Settings → Permalink and set it Post name.

Step 2: Install theme
To build a website using WordPress, you must need to install a theme. There are a lot of themes available both free and premium and you need to choose the best WordPress theme for better customization and performance. To know how to choose the best theme for WordPress website, check the article: 12 Essential Factors to choose Best WordPress Theme.
In this tutorial, I will use Astra. Astra is a popular multipurpose theme that offers huge customization options. You can also use any theme to build your website. To choose the best theme you can check our article- 20 best free themes for WordPress websites.
Now let’s see how to install a theme on our website:
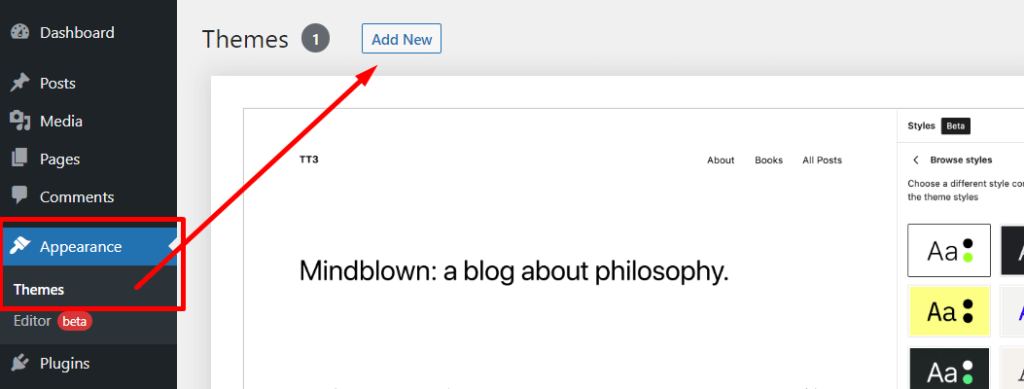
Go to Appearance → Themes from the dashboard and click on the “Add New” button at the top left.
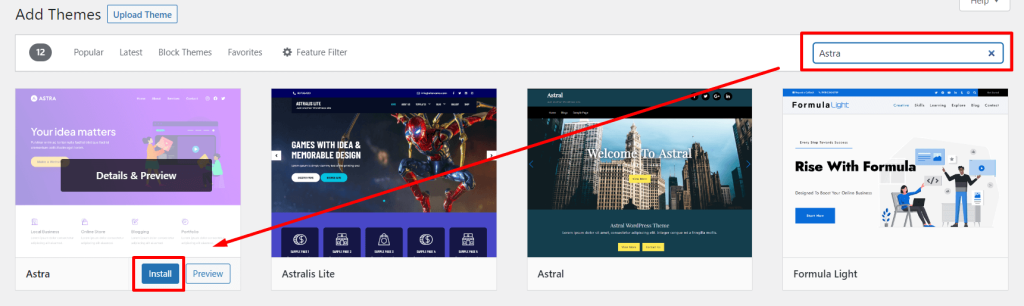
Now you will see all free themes from the WordPress repository. Now search your selected theme on the “Search field” at the right top. After getting your theme on the search result click on the “Install” button and then “Activate” it.
If you use a premium theme that is not available on the WordPress repository, you need to upload the theme. You will see an “Upload” button at the top and click on it. Now select or drag your downloaded theme from your computer and click on the install button. After installing you will be redirected to another page and now Activate the theme.
Step 3: Import the demo website.
After activating the theme, we need to design our website. But here I will not design from scratch. Here I will import a demo template to easily complete our website design. Most of the themes offer many demo website templates to make a website within a moment.
Now we need to install Astra’s template importing plugin. Don’t worry, every theme has its own plugin to import templates. Now follow the steps below.
- Go to Plugins → Add New.
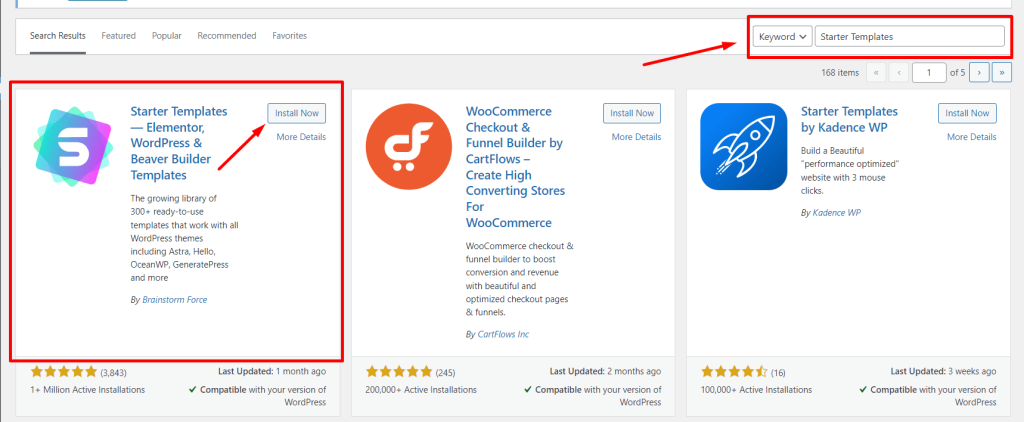
- Search Starter Templates at the top right.
- Click on Install → Activate.
- Now click on Back at the left bottom.

Our Plugin was successfully installed. Now let’s import the template.
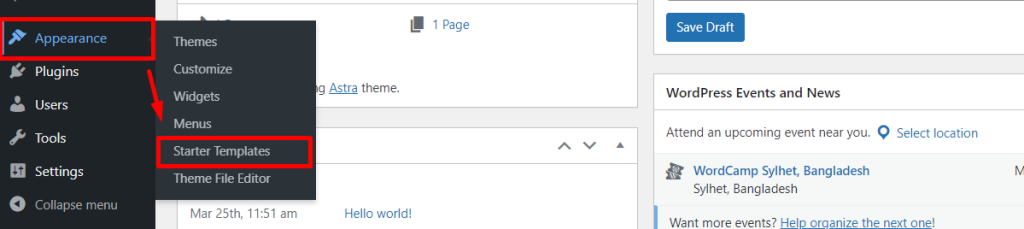
- Go to Appearance → Starter Templates
- Click on the “Build New Website” button
- Select a page builder that you want to use. Here I use Elementor.

- Select a template. If you use Astra pro you will be able to import premium templates.
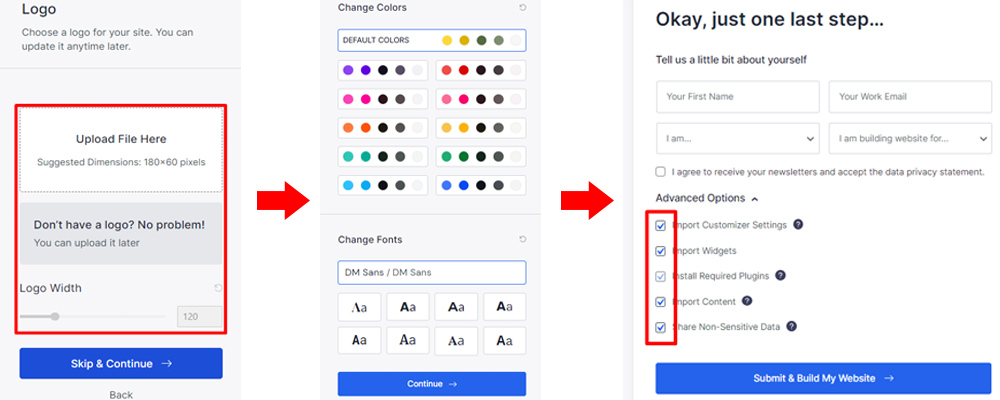
- Now select the logo, change logo width, choose website color and fonts, and click on continue. If you don’t have a logo to upload you can skip it. Then the website template is automatically imported and you will see congratulation message when it is done.
Now our website is ready and looks great. You can customize your website easily.
Step 4: Customize the theme
If you use Elementor or other page builders, you can able to customize the website’s header, footer, sidebar, color, typography, fonts, menu, etc from the customizer. You do not need any coding knowledge. Now follow the steps to customize the website:
Go to Appearance → Customize
The customization options of all the themes are not the same but similar. Some themes have huge options to manage websites. Here I will discuss Astra theme customizer options.
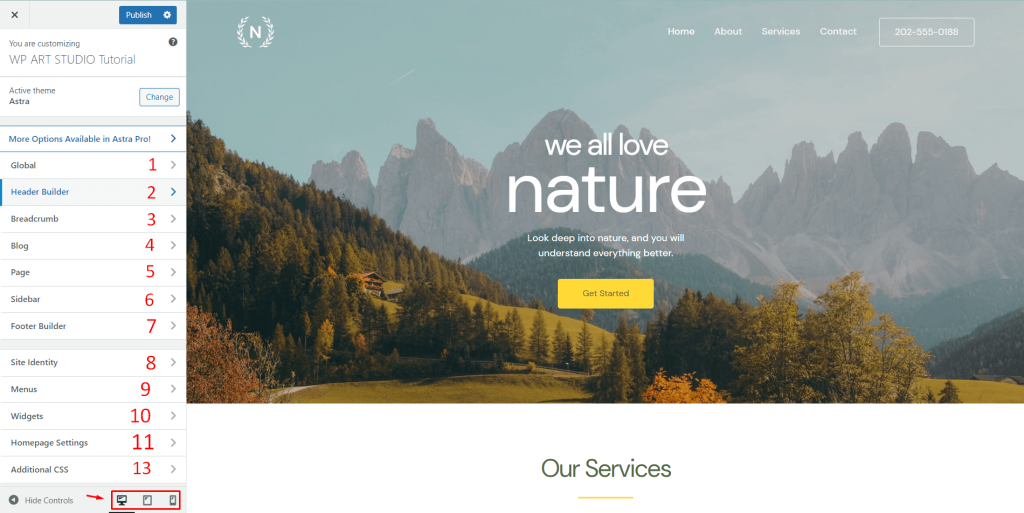
(1) Global: The global option works on your entire website. Here you can manage website color, fonts, typography, layout, button style, etc from one place.
(2) Header Builder: Header builder allows you to manage headers such as the top header, main header, and bottom header. You can change the logo, and menu, and add or remove buttons even you can manage the mobile menu from here.
(3) Breadcrumb: Astra theme offers a built-in breadcrumb feature. You can easily manage breadcrumb and its design from here.
(4) Blog: The blog option allows you to change or manage the website’s single post and blog archive layout. You can also rearrange blog content, title, meta, featured image, etc. Astra also included single and blog archive design options to it.
(5) Page: From the page option, you can change the container layout, sidebar, banner layout, alignment, spacing, page title color, etc of the website pages.
(6) Sidebar: You can manage your sidebar width and location from the sidebar menu.
(7) Footer Builder: Footer builder allows you to build your website footer by dragging elements. You can easily create the above footer, primary footer, below footer and also manage colors, and typography from here.
Now let’s talk about WordPress default customizer options:
(8) Site identity: The site identity option enables you to change the site icon.
(9) Menu: This option is very important to manage the website menu and menu location. You can also access this menu from the dashboard → Appearance → Menu. You can create, change, delete, design menus, or even set menu locations from here.
(10) Widgets: You can manage all widgets, and add or remove elements to widgets from here.
(11) Homepage Setting: This option allows you to select a home and blog page for your website.
(12) Additional CSS: Additional Css is an important option. You can add custom CSS code to make any changes to your website.
You can also make any changes for different devices such as Desktop, Tablet and Mobile. You will see responsive icons at the customizer bottom for different devices. After changing you must publish it. Now click on the Close icon at the top left to go to the dashboard.
Step 5: Edit page content
Now let’s see how to replace website content with your own content. Though I select Elementor page builder during template import, so we can edit our page and replace the content using Elementor page builder. So let’s see how to edit our page using Elementor.
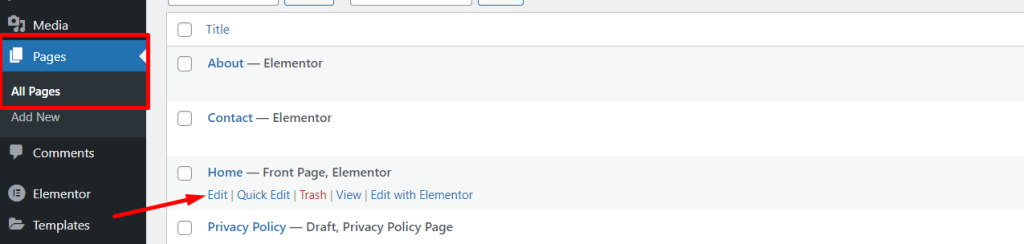
- Go to Dashboard → Pages → All Pages
- Click the “Edit” option on the page you want to edit.
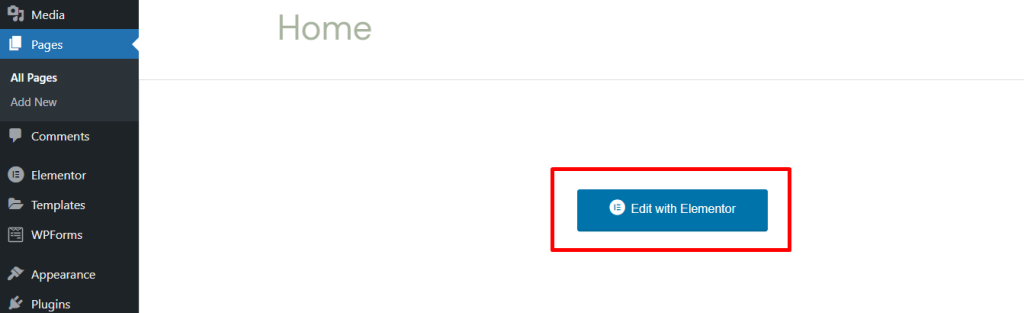
- Now click on the “Edit with Elementor” button.
You will be automatically redirected to the editing page. Now click any text image or widget that you want to edit and you will see fields and options on the left side to change content. After the change, don’t forget to update it. You will find the update button at the bottom.
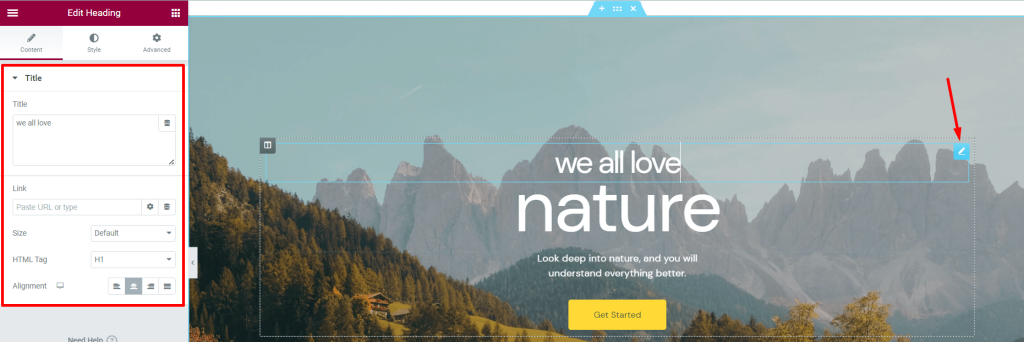
Elementor also allows you to change text style, typography, and so on. You will find all the options in the Style tab. Besides, a lot of useful options are available on the Advanced tab. If you don’t know how to edit the page using Elementor, you can see their video tutorial.

Step 6: Add page or posts
Sometimes you may need to add pages or posts to your website. For this, it is very essential to know how to add pages and posts to your website. So, let’s see how to add a page.
- Go to Dashboard → Pages → Add New
- Now add page title (1) → Add page Content (2) → Add featured image(3)(Its optional)
- Now publish page (4)

If you want to design your page using Elementor page builder, First publish the page and then click on the “Edit with Elementor” button (5). After designing your page using Elementor, don’t forget to update it. You will see the update button at the bottom left.
Now let’s see how to add a post to your website. Follow the steps:
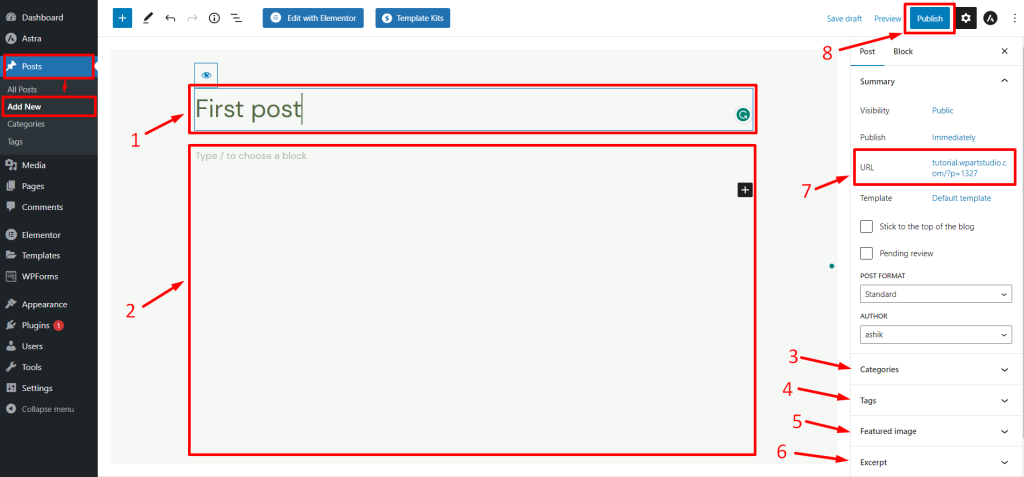
- Go to Dashboard → Posts → Add New
- Add title(1) → Add post Content(2)
- Add Category(3), Tags(4), Featured Image(5), Excerpt(6)
- Change Post URL(7) → Publish Post(8)
How to edit or add pages in the menu?
After creating a page you may need to add the page on the header or other menu. So now let’s see how you add a page to the menu.
- Go to Dashboard → Appearance → Menus
- Select a menu(1) or create a new one.
- Check the pages (2) that you want to add and click on “Add to menu” (3)
- Save the menu (4)

You can also arrange menu item positions by dragging.
What next? After creating a website, you need to make sure it’s optimized for search engines, create quality content, promote it on social media, and track your traffic and user engagement. You may also need to consider monetization strategies and regularly update and maintain your website.
Conclusion
Creating a website using WordPress is not hard. If you have some technical knowledge, You can create a website within a moment without hiring a developer. It also saves your money too. You will also get lots of themes and plugins for free.
By following the steps outlined in this guide and taking advantage of the many resources available online, anyone can create a beautiful and functional website using WordPress.
If you have any questions don’t forget to share them with us. Enjoy our other article to get more tips and guidelines.