
Looking for the best tutorial on how to connect domain with hosting? Yes, you found the best article.
Connecting a domain to hosting is not very hard. If you have some technical knowledge, you can easily connect. It is very important to make your site visible to users. After connecting the domain to hosting, anyone can access your website via your domain name.
First, we need to select the best domain that is perfect for your business or brand. Besides, also need to select a hosting plan according to your needs. We already publish an article about how to choose the best domain and hosting plan for your website. So you can check.
I started writing this article to make beginner friendly, so I will discuss everything in this article. So without further ado, let’s dive in deep.
Why need to connect domain with hosting?
Connecting a domain name to a hosting account is essential for making your website accessible to others on the internet.
A domain name is the address of your website that people use to access your website. On the other hand, hosting refers to the physical location where your website files are stored and served to visitors when they visit your website using the domain name.
When you connect your domain name to your hosting account, you are essentially telling the internet where to find your website files. As a result, when visitors visit your domain name, the browser sends a request for your specific server to access your website files. Without this connection, your website would not be accessible to anyone.
How to connect the domain with hosting server?
We can connect the domain to hosting with a few steps. Those are:
- Log in to your domain registrar account
- Find Name Server or DNS management setting
- Edit and update the name servers
- Save and you’re done.
Log in to your domain registrar account
First, go to your domain provider’s website and log in there. Here I used Bluehost but the process are same. After login, the site redirects you to a dashboard where you can see all the services and domains that you purchased.
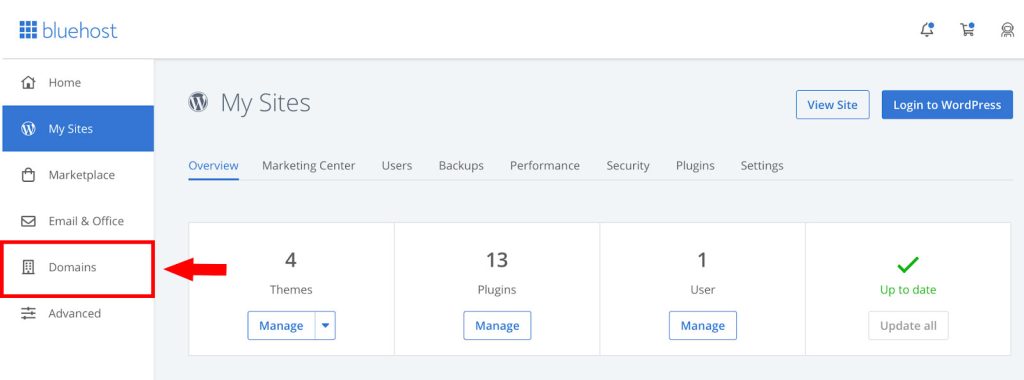
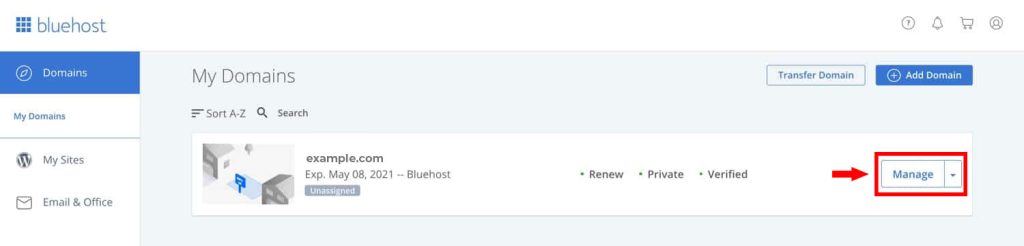
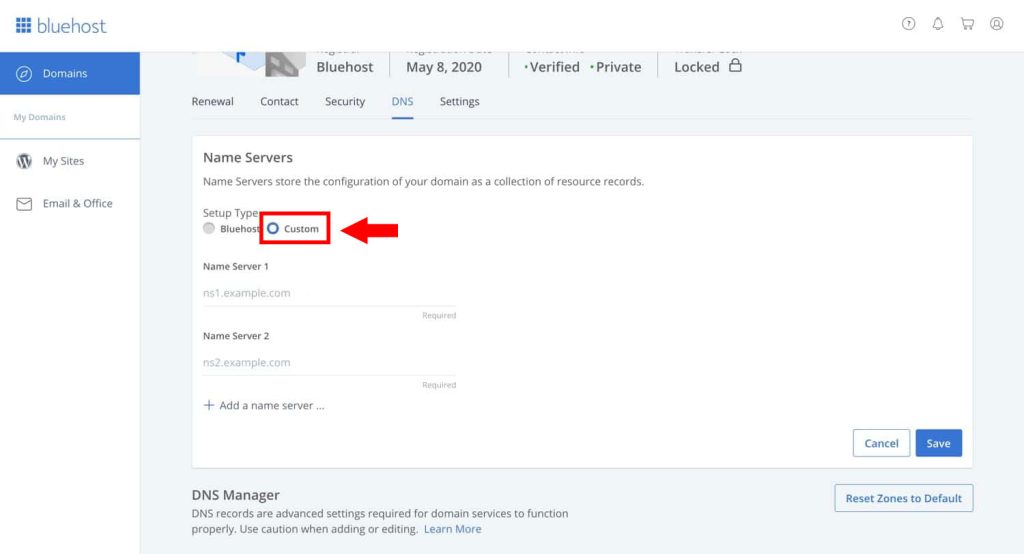
Find Name Server or DNS management setting
Select the domain that you want to connect with another hosting. Some hosting has a “Manage” button, click on it. Then find the DNS or NameServer setting.
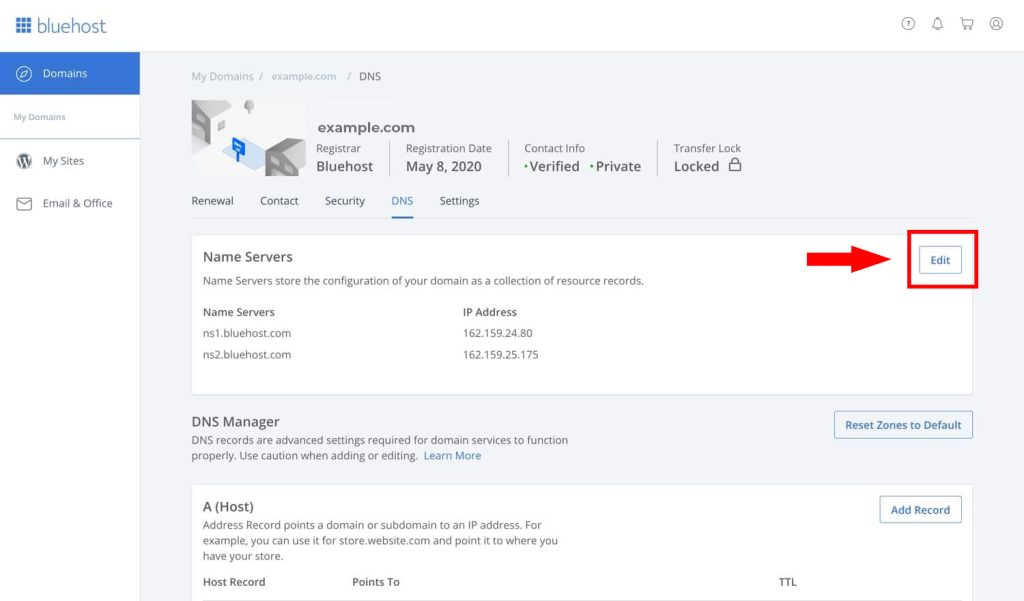
Edit and update the name servers
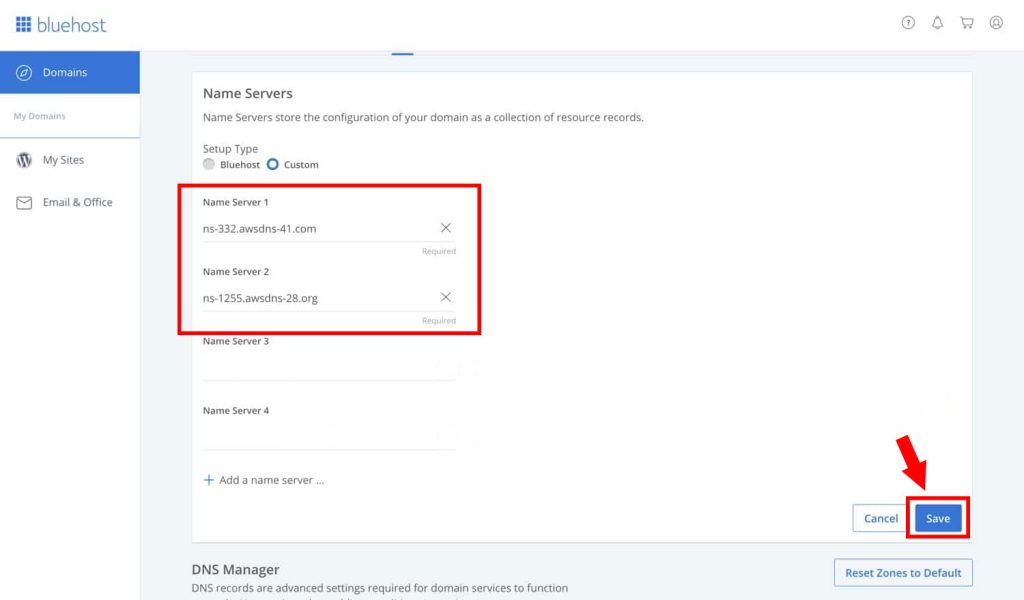
Edit the nameserver and choose ‘Custom’ or ‘Custom nameserver’. Now you will get fields to input new hosting nameservers. When you purchased the hosting plan, the hosting provider emails you the nameserver addresses. Typically, these will be in the format of “ns1.hostname.com” and “ns2.hostname.com“. If you are unable to get nameservers, you can contact the hosting provider.
Save and you’re done.
After getting the nameserver, you need to input the nameserver into the field and save it. Now, all done. Wait a few minutes to update. Sometimes it takes 48 hours to update the nameserver.
After completing domain connect, you may need to transfer your website. We already publish an article on how to transfer a website to a new domain or hosting. So check the article.
Conclusion
Connecting a domain to hosting requires a few simple steps. You just need to update the domain nameserver which you get via email provided by your hosting provider. If you are unable to update the nameserver, you can also get help from your domain provider.
After updating nameservers, you need to wait for the changes to propagate. Normally it takes a few minutes to update but sometimes it takes a few hours or up to 48 hours.
Now I hope you will be able to update the nameserver. If you face any problems, you can let us know via the comment box.