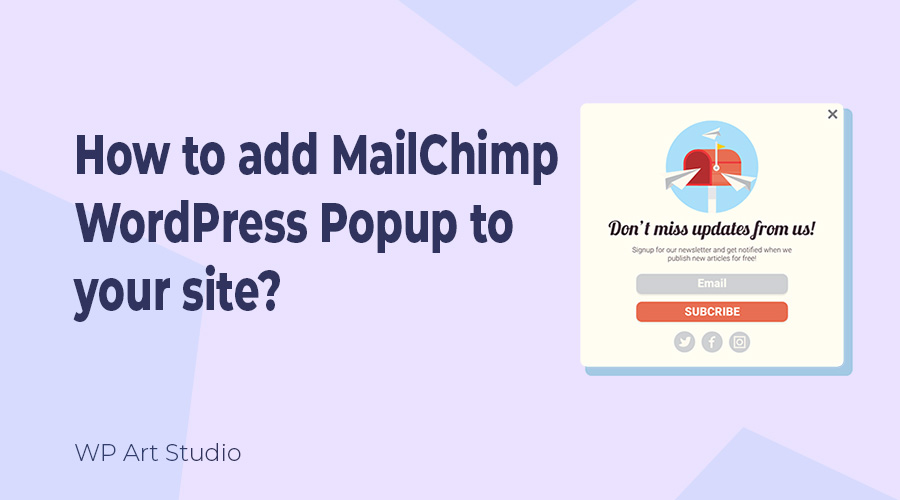
Don’t know how to add MailChimp WordPress popup to your site easily? You found the best article!
If you want more users or audience for your site, email marketing is very essential. On the other hand, for email marketing you need email subscribers. You can increase your email list by collecting email from users and here MailChimp plays an important role.
MailChimp is one of the most popular Email marketing platform that makes your email marketing flow easier. You can increase your email list by integrating MailChimp subscribe form into your WordPress website without any hassle.
In this tutorial, I will show you all the process of how to add MailChimp WordPress Popup to your website to grow your email list. There are many ways to add a MailChimp popup to the WordPress website but here I will show the best and easy way so that you can understand easily.
So without further ado, let’s get started..
Also read: How to connect MailChimp to WordPress?
Why do we use MailChimp to collect emails?
Mailchimp is one of the most popular email marketing platform that allows site owners to send marketing emails and help to collect visitor emails to grow email listings. Using this email marketing platform you can create various opt-in forms, such as popups, embedded forms, subscription forms, etc. to collect email.
Mailchimp enables user to manage and automate email marketing campaigns without any hassle. You can easily send promotional and newsletter emails to increase website visitors and audience. This platform also allows you to create targeted email campaigns based on user preferences and behavior. It scans user names, email addresses, etc. to send personalized and relevant emails to different segments.
How to add MailChimp WordPress Popup to your website?
If you search for the MailChimp WordPress popup, you will get many articles and video tutorials. Before writing this article, I also researched on this topic but most of the articles or tutorials were made with complex processes. So, I tried to make this tutorial easier. So let’s see how to add MailChimp WordPress Popup to your site.
Step 1: Create MailChimp Account and Generate API
First, we need to create a MailChimp Account. It is very easy. Go to MailChimp.com and you will find LogIn and Sign Up buttons at the top right. If you already have an account, you can simply login there. To Sign Up as a new user click on the Sign Up button to create an account by selecting a plan. If you are unable to create Mailchimp account, Click here to see the account creation process in detail.

To create the API key, go to your MailChimp account dashboard, and click on “Avatar Icon” at the top right. Now go to Account → Accounts & Billing → Extras → API Keys. Now scroll down and click on the “Create A Key” button. Provide the key label and click on Generate Key. Copy the key and save the key in a secure place. You can also see the API key-generating process in detail.


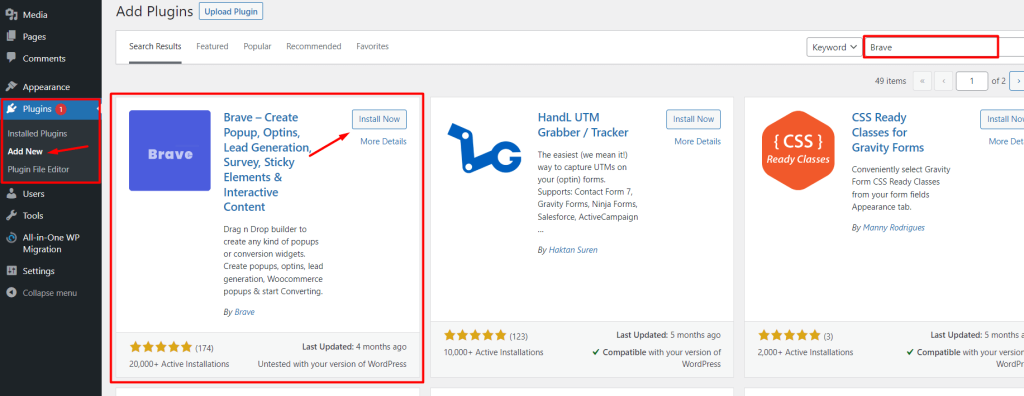
Step 2: Installing Brave popup plugin and Integrating MailChimp
Now go to your WordPress Dashboard → Plugins → Add New. You will be redirected plugin page. Type “Brave” in the search box and install and activate the first plugin.
After activating the plugin, you will see a new tab called “Brave”. Now go to Brave → Integrations → MailChimp, Provide the API key that you copied before, and click on the “Connect” button.
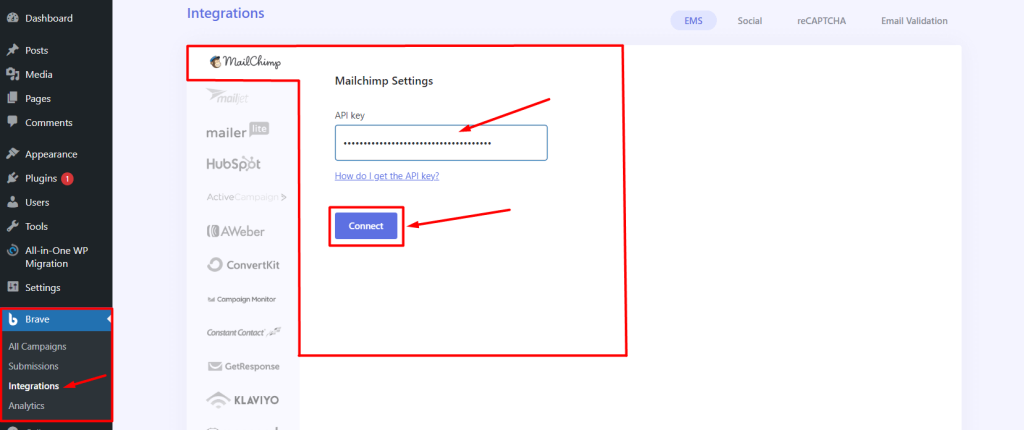
Once the API key is connected, you will see a success message.

Step 3. Create and design the popup
Now we need to create a popup with MailChimp subscribe form. So let’s see the process:
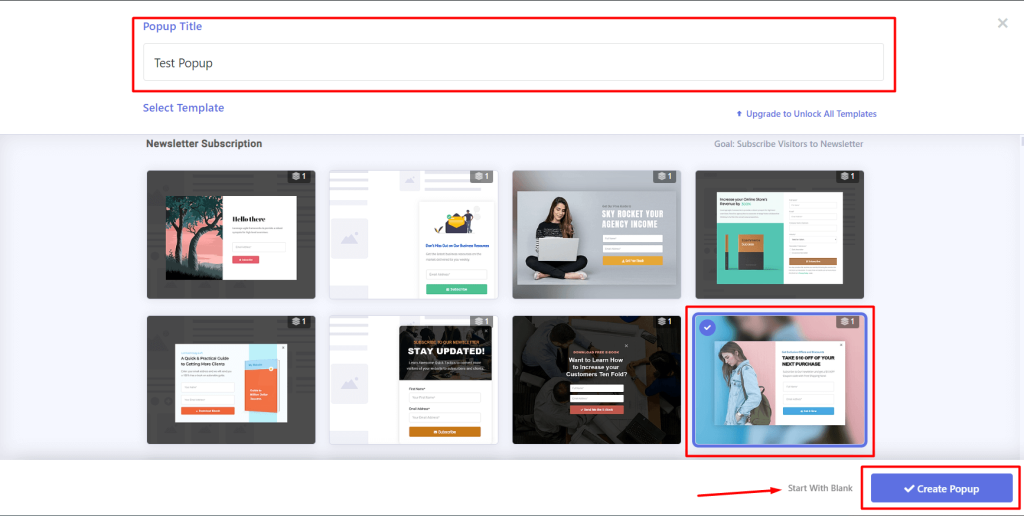
Go to Brave → All Campaigns and you will see a Plus icon at the top right. Click on Plus Icon → New Popup/Widget to create a new campaign.

Now provide a popup title and select a template. If you want to design a popup from scratch, you will see a Start With Blank option below. Here I use a pre-made template. Now click on the Create Popup button.
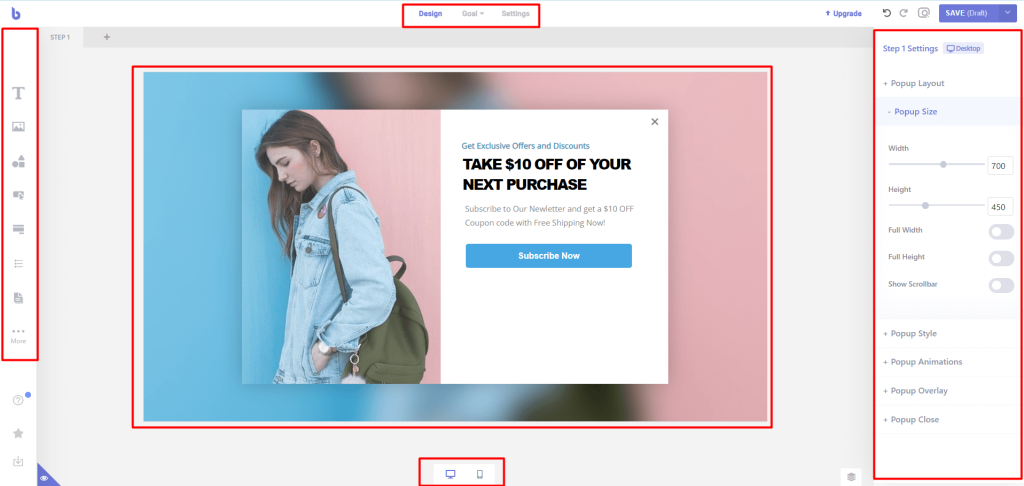
Now you will be redirected to the Popup Building page. You can easily design your popup by dragging elements from the left panel. All the elements are fully customizable. From the right panel, you can manage popups and element settings easily. To get the setting of any element, just click on it.
Step 4: Connect your poppup with MailChimp
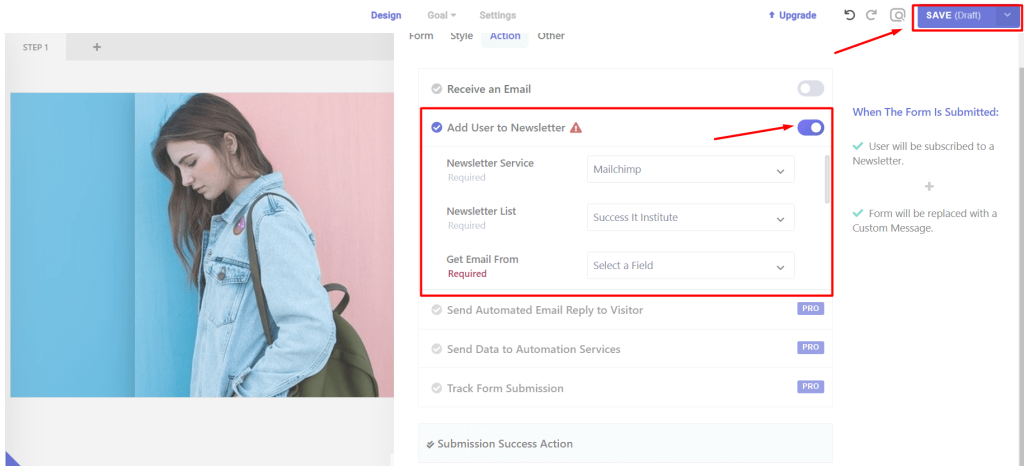
Once your popup design is done, now Double Click on the form element. You can add more fields, style them, and also set the action to the form.

Now let’s see how to connect the form to the MailChimp list. Go to Action → Add user to Newsletter and enable this. Now select “Newsletter service”, “Newsletter List”, “Get Email” and “Get Name”. Now click on the Save button dropdown and publish the popup.
Other some extra options:
Once published, you will see a beautiful popup will display on your site on page load. You can also change the triggering system from setting at to top center.
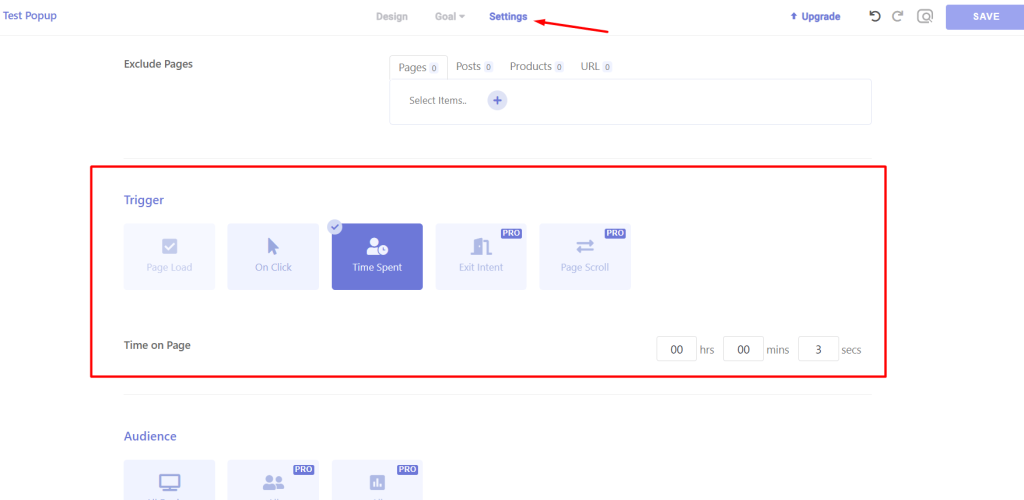
You can also set campaign goals easily from the top goal option.

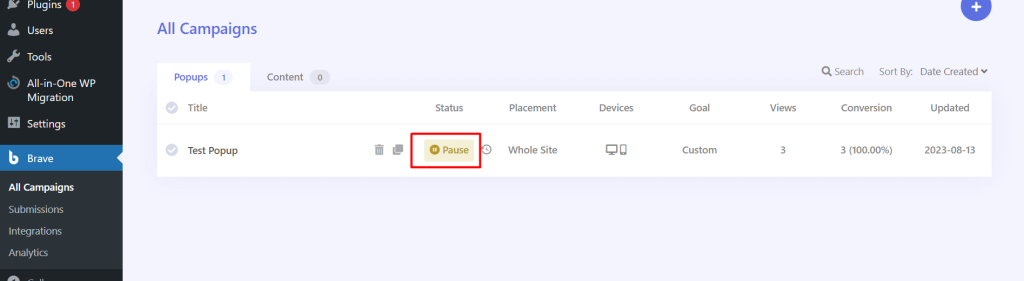
If you need to pause any campaign popup you can easily do it. To pause any popup, go to Brave → All Campaign→ Hover the status “Active” and click the Pause button. You can also delete or duplicate the campaign, View Conversion, goal, total views, last update, etc.
Final Thought
Creating a subscribe popup using the WordPress Brave plugin is very easy. I found many articles and video tutorials that used many plugins or used the Elementor plugin. So if your site was not built with Elementor, it is tough to design a popup? In the process I show above, you can implement MailChimp WordPress popup easily, it does not matter which page builder you use to design your website.
Brave is a good plugin that offers all the essential features to make a customizable popup using MailChimp. You just need this plugin and MailChimp account. The Brave plugin also offers more advanced features on its premium version. So if you want more advanced features, you can buy the pro version.
So are you ready to implement MailChimp WordPress popup to your website using the Brave plugin? Don’t forget to let us know by leaving a comment. Continue reading more tutorial articles from our blog.