Do you know how to enable maintenance mode in WordPress during the development of your website? If don’t know, read the full article.
If you are running a WordPress website or blog, sometimes you may need to perform maintenance or updates. Maintenance mode is essential to stop seeing your visitors broken or buggy sites during update.
You can easily enable maintenance mode using a plugin. Besides, if you are using Elementor to design your website, you will get this option by default. You just need to create a template and do not need any plugins. Don’t worry, I will cover everything in this article.
Whether you are a beginner or an experienced WordPress user, this tutorial will help you put your site in maintenance mode in just a few easy steps, without affecting its functionality.
So, let’s get started and learn how to enable maintenance mode in WordPress.
Also check: How to move WordPress site to new domain?
Why need to enable maintenance mode during development?
Enabling maintenance mode during development is a good practice to ensure that visitors to a website or application do not encounter any errors or unexpected behavior while developers are making changes or updates to the site.
During development, changes to code, database schema, or other critical components can cause the site to malfunction or produce errors that may be visible to the users. By enabling maintenance mode, developers can prevent users from accessing the site while changes are being made, reducing the risk of errors and ensuring a smoother development process.
Enabling under development mode is a simple and effective way to inform your visitors that your site is temporarily down for maintenance and assure them that you are working to improve the user browsing experience.
Maintenance mode can also provide a better user experience by displaying a customized maintenance page with an informative message about the status of the site, an estimated time for the update to complete, and instructions on what to do next.
Also check: How to speed up WordPress Website Performance?
How to enable maintenance mode in WordPress step-by-step?
Enabling maintenance mode is not hard. If you know the actual process, you can easily enable maintenance mode during the update of your site within a moment. Now let’s see how to enable maintenance mode in WordPress website. I will show two processes here.
Enable maintenance mode in WordPress using plugin
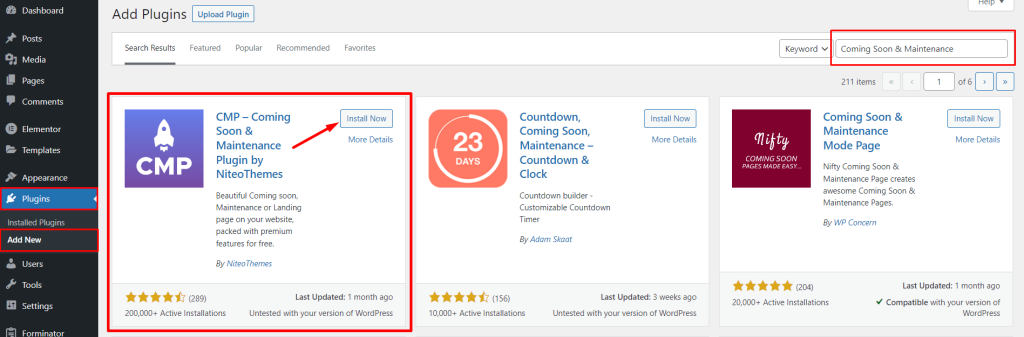
Enabling maintenance mode using a plugin is a quick and easy way to implement this feature on your website. There are many maintenance mode plugins available for WordPress websites. Here I use a popular Coming Soon & Maintenance Plugin by NiteoThemes. Let’s see the steps.
- Go to Dashboard → Plugins → Search for “Coming Soon & Maintenance“
- Click on Install → Activate.
- Now go to Dashboard → CMP Settings → CMP Basic Setup
- Enable Maintenance mode
- Activate another theme(if you want) → Save Changes
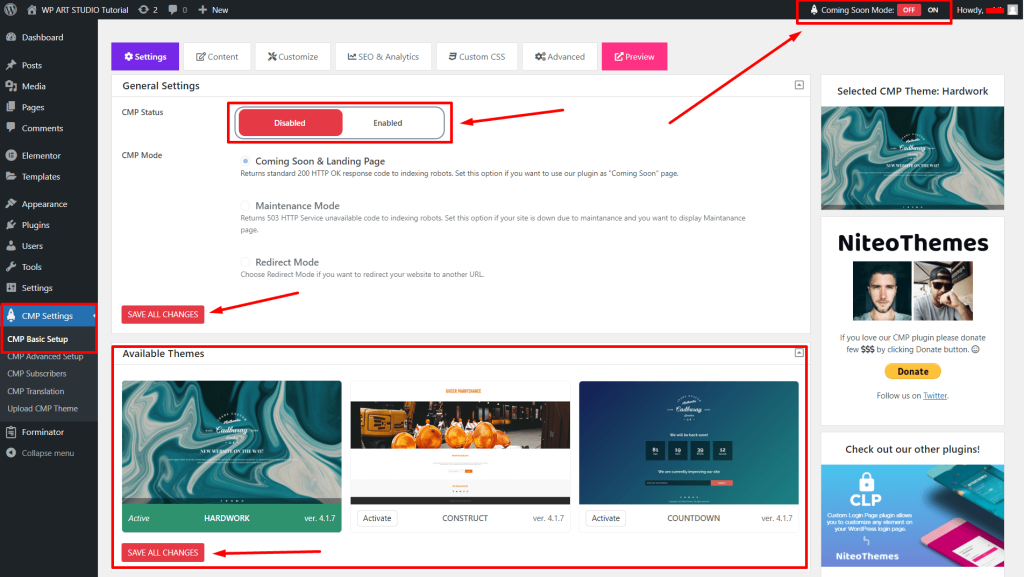
Note: You can enable or disable maintenance mode anytime from the WordPress top bar at the top right.
Now let’s see how to add or edit the content, background, count down, etc of maintains page. First, go to Content Tab and you will find some options those are:
Logo Setup: From here, you can add text as a logo or also add a graphical logo.
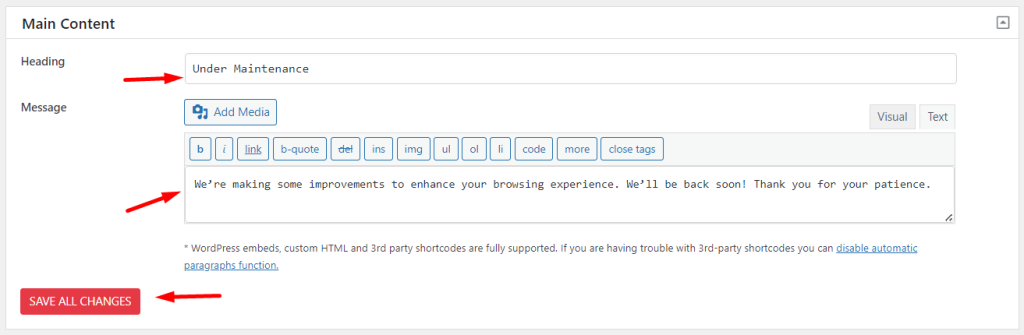
Main Content: This section allows you to add content for your visitor about your update or any content that you want to show your visitor.
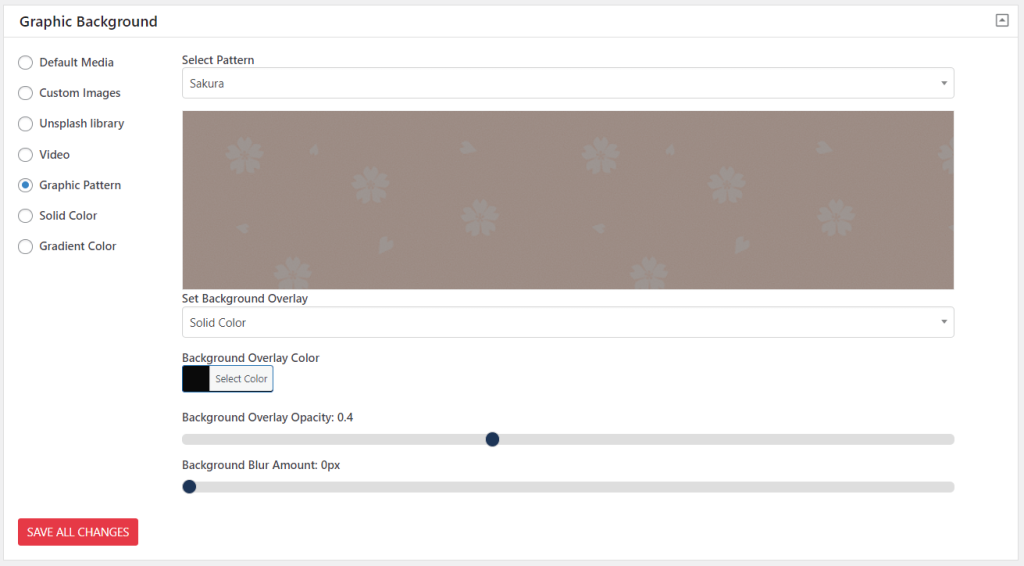
Background: From this section, you can change your maintenance page background, Custom Images, Video, Graphic Pattern, Solid Color, and Gradient Color.
Login Icon: This section allows you to add a login icon to your page so that you can easily log in to your website during development.
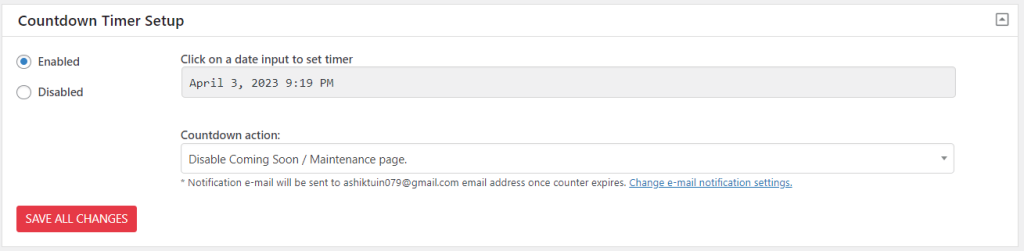
Countdown Timer Setup: You can enable or disable the countdown timer from this section. Besides, you can update the date to set a timer. Plus, this section allows you to add action after counting down to the end.
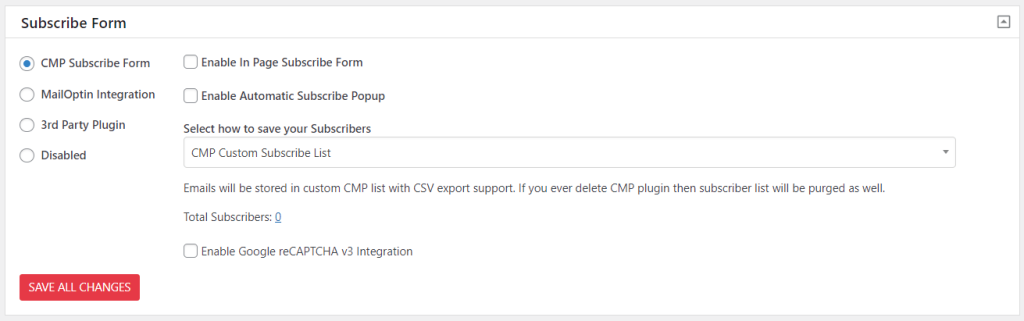
Subscribe Form: This is an interesting thing. You can add a subscribe form so that your visitor easily submit their email for updates. You can use the CMP default Subscribe form and also use the MailOptin form and 3rd Party Plugin’s form using shortcode.
Social Media: From this section, you can add social media icons with proper linking so that your visitor easily visit your social media accounts.
Footer Content: This section allows you to add content such as copyright, developer company credit, etc.

After completing your modification or changes you must click on the “Save Changes” button to update changes.
Enable maintenance mode using Elementor Page Builder.
If you use Elementor as your page builder, you do not need to install an extra plugin to enable maintenance mode. Elementor by default provides this features. Now I will show you how to enable maintenance mode in WordPress using Elementor.
First, we need to create a template for the Maintenance page. You can also import a template easily if you use Elementor Pro. Now let’s create e template:
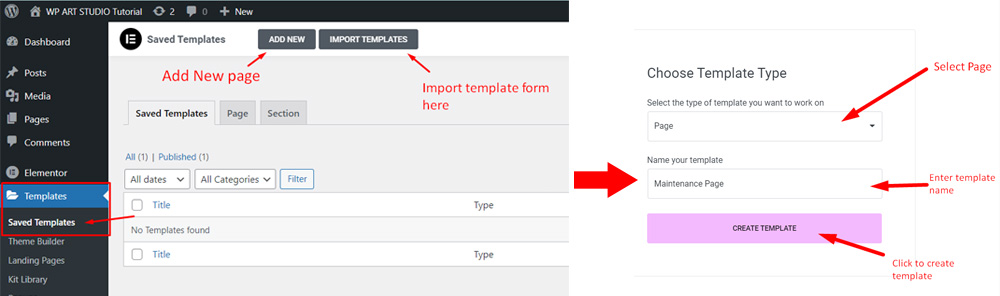
- Go to Dashboard → Templates → Saved Templates
- Click on Add New → Select Page → Enter template name → Create Template
Now you are on the Elementor editing page. You can easily create a template without any coding knowledge. So let’s start creating a template.
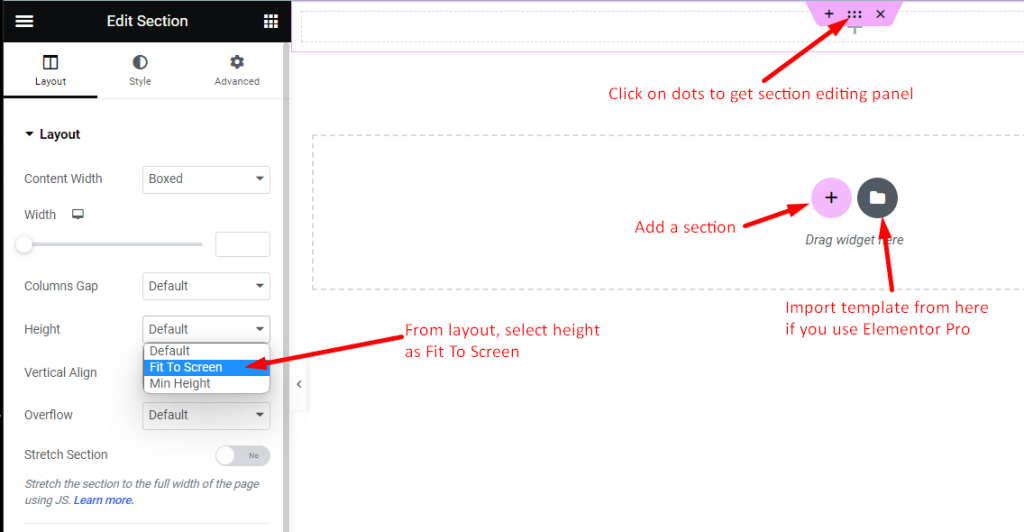
- Go to Elementor setting → Select page layout as Elementor canvas
- Add Section → Click on dots → Set height as fit to screen
Now let’s design our template.
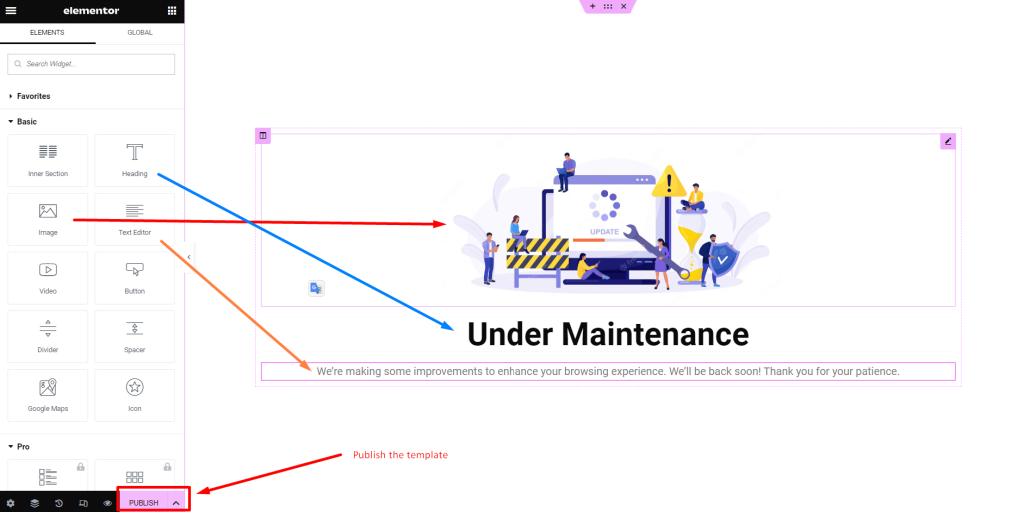
- Drag the image widget from the left panel and set the width as 50% from the style tab above.
- Drag a heading widget and change the heading text and alignment from the left panel. You can also change color and typography from the style tab above.
- Drag a text editor widget and change the text from the left panel. Set alignment at the center of the style tab. You can also add style to your description from the style tab.
- Now click on Publish
Creating our template is complete. Now we can easily enable maintenance mode using this template. So let’s see how:
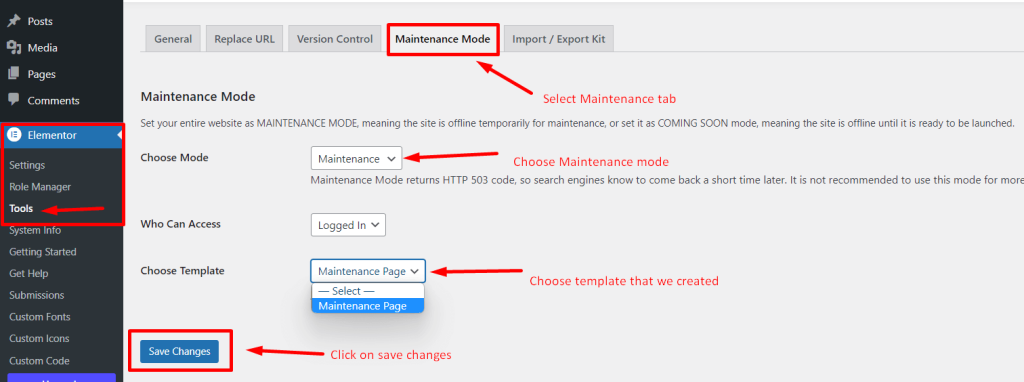
- Go to Dashboard → Elementor → Tools
- Go to Maintenance → Select Maintenance mode → Choose template → Save Changes
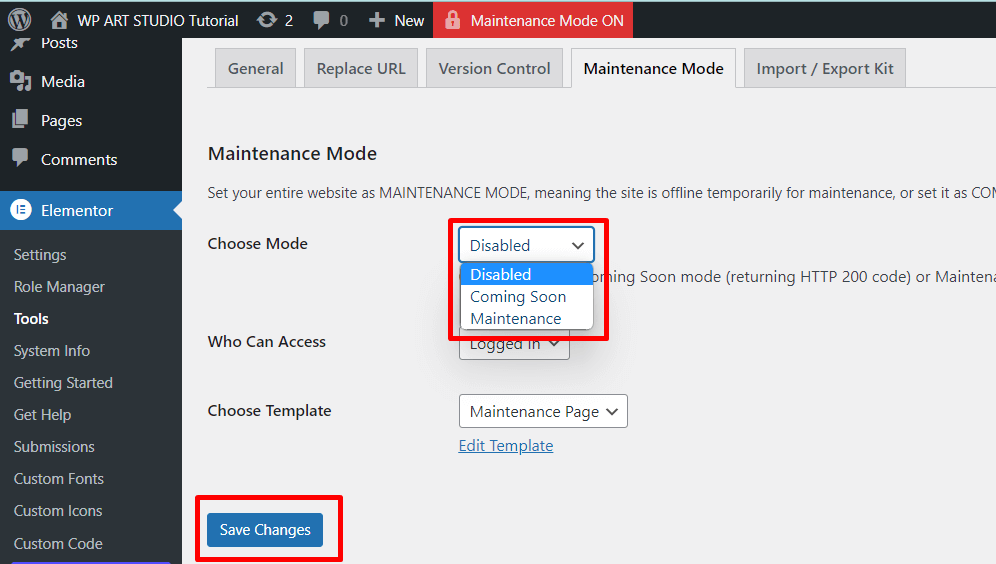
Now you can see the Maintenance mode is on. Now if you go to your website from another browser where you are not logged in, You can see just the maintenance page. So we successfully enable Maintenance mode using Elementor.

After completing an update or working on your website, you need to disable Maintenance mode.
- Go to Dashboard → Elementor → Tools
- Go to Maintenance → Select Maintenance mode as Disable → Save Changes.
So, I hope you understand how to enable and disable maintenance mode using the Elementor page builder.
Conclusion
In conclusion, enabling and disabling maintenance mode in WordPress can be easily accomplished with the help of plugins and page builders like Elementor.
By following the steps outlined in this tutorial, you can ensure that your website stays hidden from visitors while you make updates or changes to your site. This can help prevent any potential issues or errors from being visible to the public, while allowing you to work on your site without interruption.
Whether you are a beginner or an experienced WordPress user, utilizing maintenance mode is essential during working on your site. If you have any questions don’t forget to share them with us.