A website is very important and the domain name is a key to your brand. But sometimes we choose the wrong domain name for our website first. For this, we need to move our website to another new domain. But what is the best way to move WordPress site to new domain?
Table of Content
If you start moving the website manually, it is not easy. Sometimes sites are crushed after moving. So we need to move WordPress site to new domain carefully. In this article, I will teach you how to move your WordPress website easily without any hassle. So let’s get started.
Before transferring the website, I hope you have a new hosting account and you are familiar with the hosting dashboard. You also need to know some basic things like how to install plugins, create a database, and how upload files on a hosting server.
I am assuming, you already know those things. So now we move to the next step to transfer the website.
Move WordPress site to new domain using Duplicator plugin
Duplicator is a popular WordPress plugin for transferring a website from one hosting to another hosting or domain. You can easily transfer the website by following some steps. So let’s start…
Step 1: Install plugin and create website package
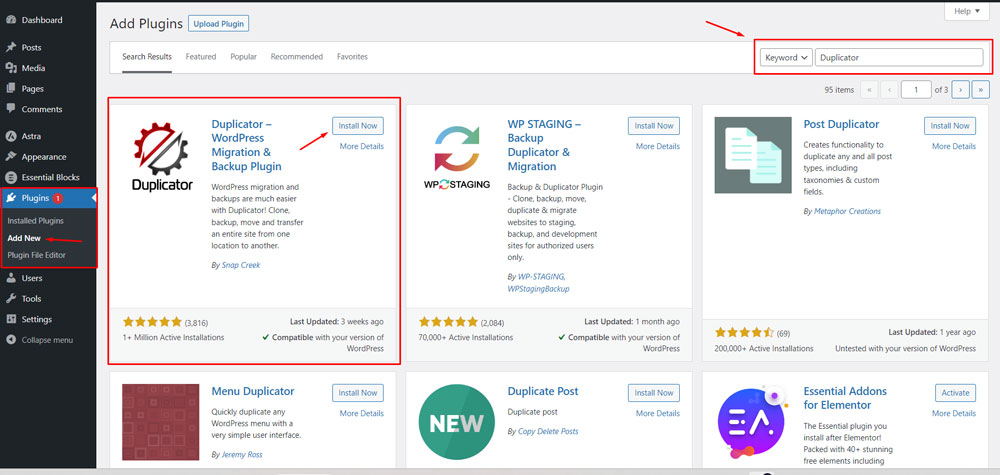
First, we need to install the ‘Duplicator’ plugin. Go to your website access page and log in by providing your username and password. Once login is done, you will redirect to the WordPress dashboard. Then follow the steps.
- Go to plugins from the left menu. > Click on Add New
- On the plugin page, type ‘Duplicator’ in the search field at the right top corner.
- You will see the duplicator plugin first and click on the “install” button to install the plugin.
After installing the plugin, activate it and you will redirect to the plugins page automatically. Now you will see the Duplicator menu at the bottom left. Now follow the steps:
- Go to Duplicator > Packages > Create new > Next
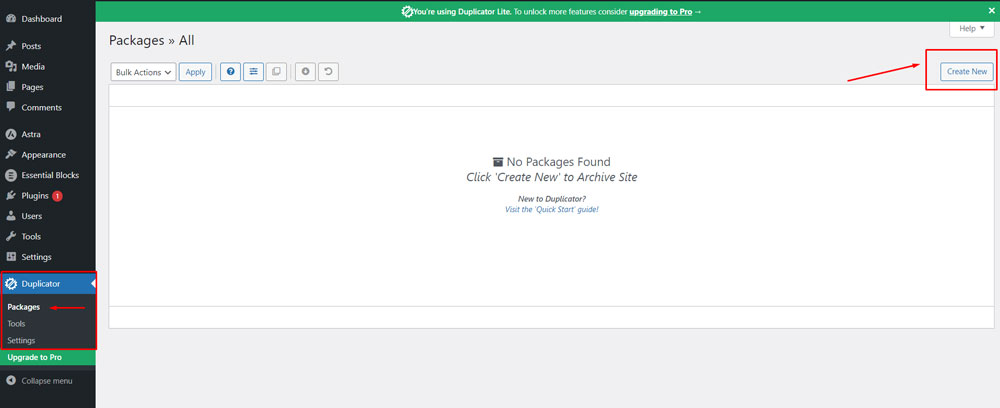
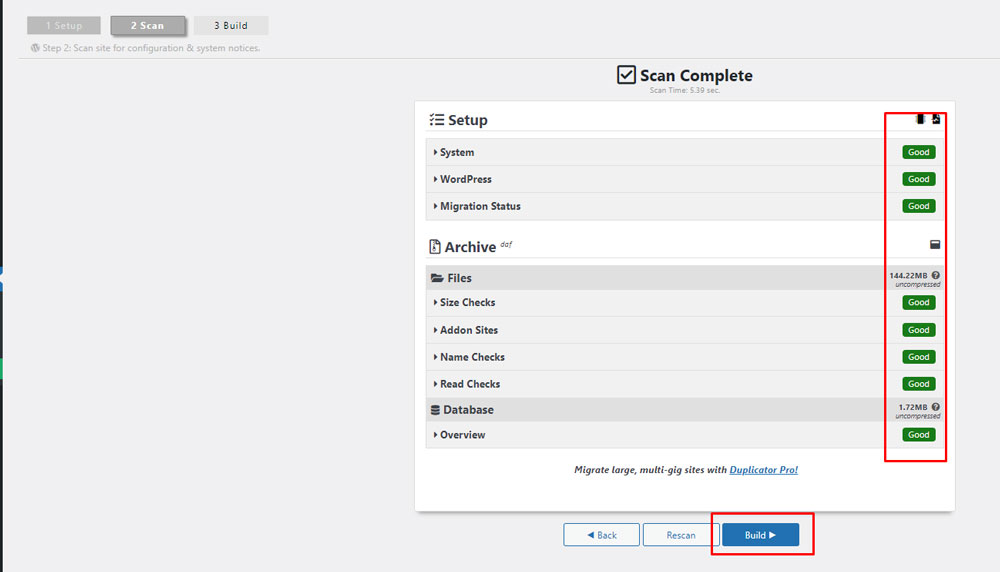
The plugin automatically scans your website files and displays a page for the building archive file. You just check “Yes. Continue with the build process!” and click on the “Build” button.
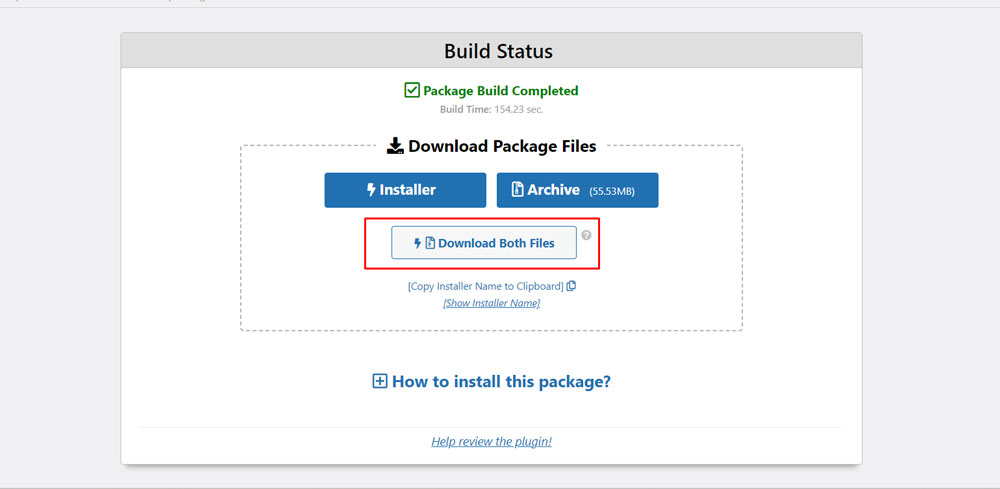
After the package build is completed, you will see the download option. You can download files individually or also download both files at a time with one click download. The download file will store your on computer.
So the website is ready for moving to new hosting or new domain. Now I will show you how to transfer the website.
Step 2: Create database and user from cPanel
Go to your cPanel by entering the URL https://yourdomainname.com/cpanel and log in by providing your username and password. After login, You will see the website cPanel dashboard. First, we need to create a database and user.
To create a database and user:
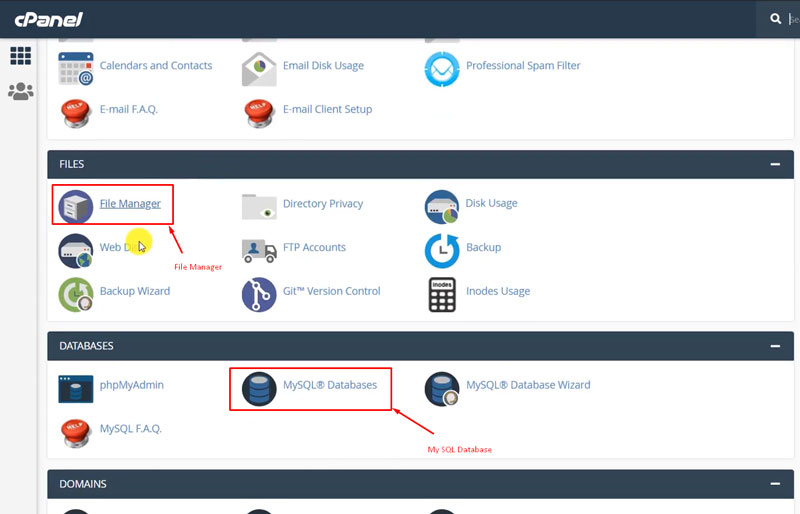
- Go to MySQL Database from the cPanel Databases tab.
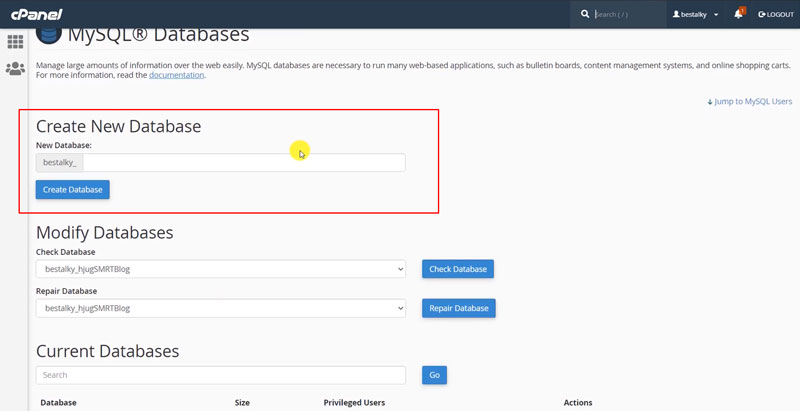
- Enter the new database name.
- Click on Create Database button.
You will get a successful message after creating the database and then click on “Go back”.
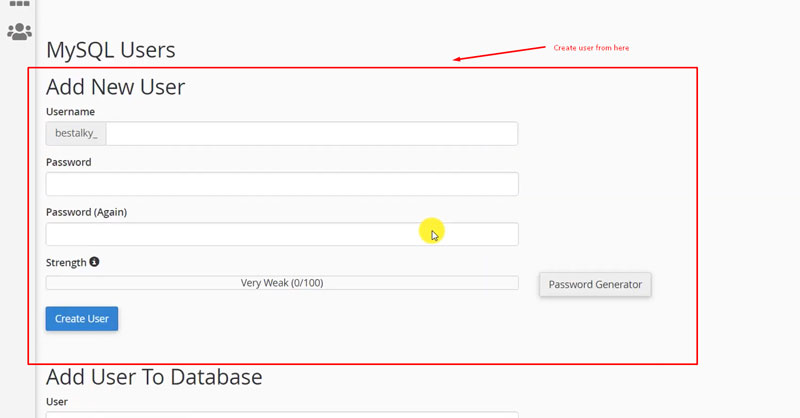
Now scroll down and you will find fields for adding a new user. Follow the step to create a user.
- Provide a username and strong password
- Click on “Create user”
- After creating a user, again click on “Go back”.
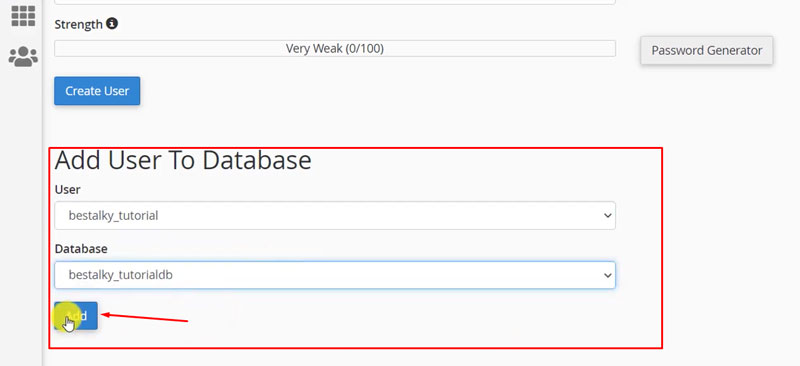
Now we need to add our new database to the new user. Scroll down the database page and you will see a field add user to the database. Now select the new database and new user then click the “Add” button.
You will redirect to a new page. Here check “All privileges” and click on the “Make Changes” button below.
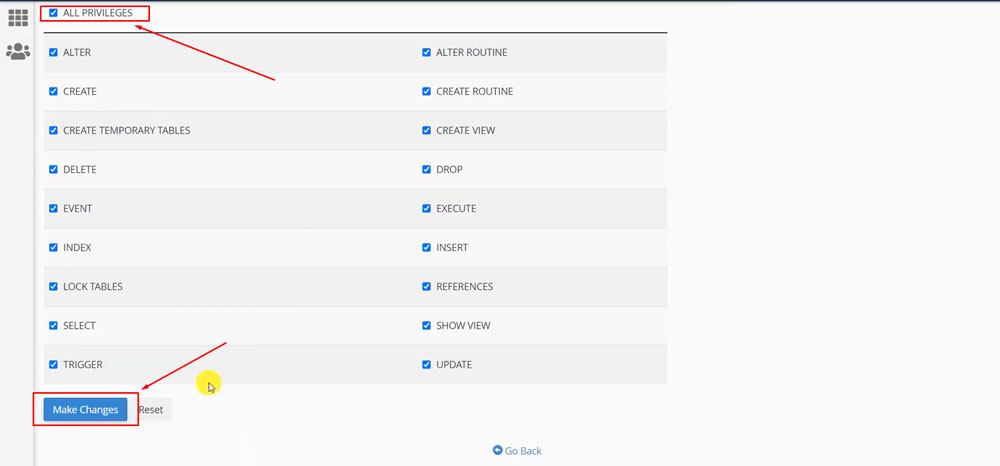
So database and user creation are completed. Now we go to our cPanel dashboard by clicking on “cPanel logo” at the top left corner.
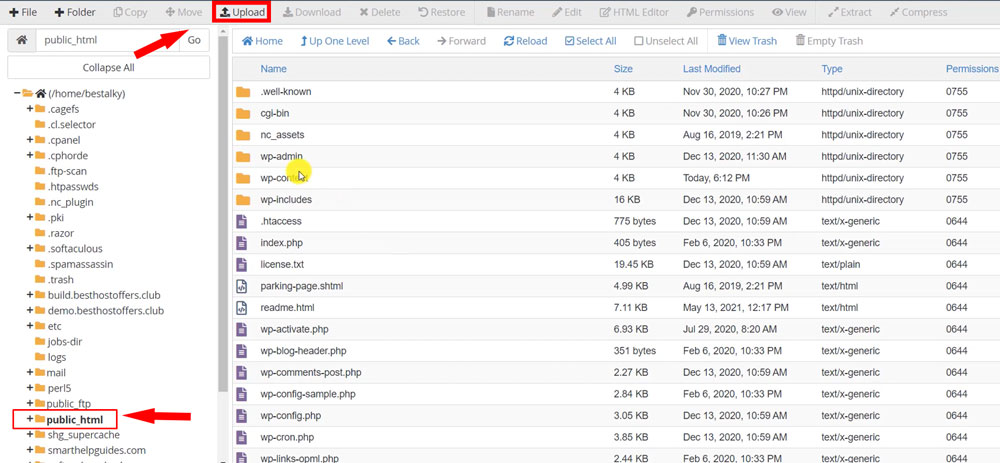
To upload our website backup, go to the file manager and click on “public_html” from the left side.
Note: If you add your domain as a subdomain, you will see your domain name as a folder on the left and click on the domain name.
Now we need to upload the file that we downloaded from the duplicator.
To upload file, click on “Upload” at the top area and select or drag your file to upload. After completing the file upload, click on “go back”. Then if you can’t see the uploaded file, reload the window.
So, the main and complex work to transfer our website is done. Now we have just a few steps to complete our website migration.
Step 3: Duplicator setup wizard
Go to a new tab of your browser and go to the link by replacing yourdomainname.com with your domain name:
“https://yourdomainname.com/installer.php”.
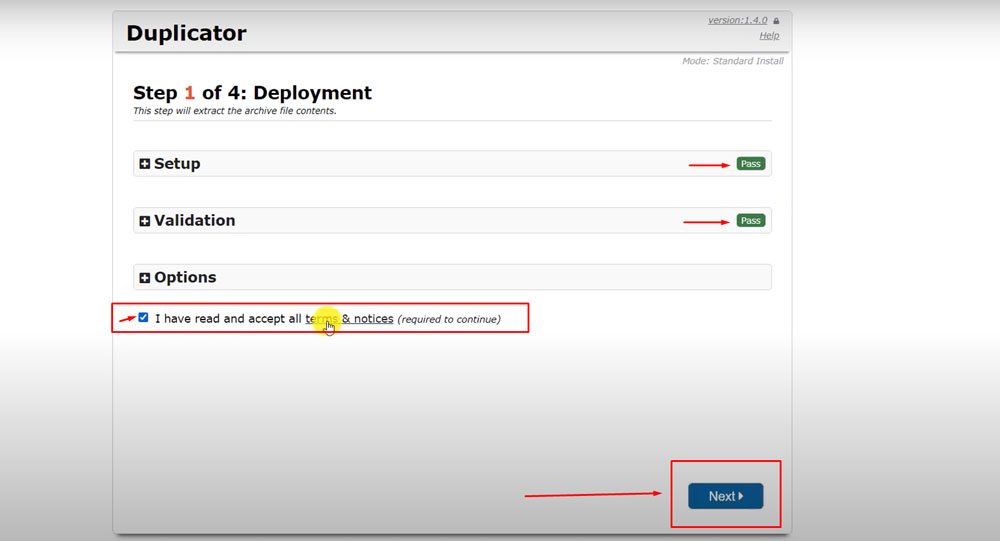
Now you will get the duplicator setup wizard and it runs some tests and will show you ‘Pass’. To start setup, accept all the terms and notices and click on “Next” button.
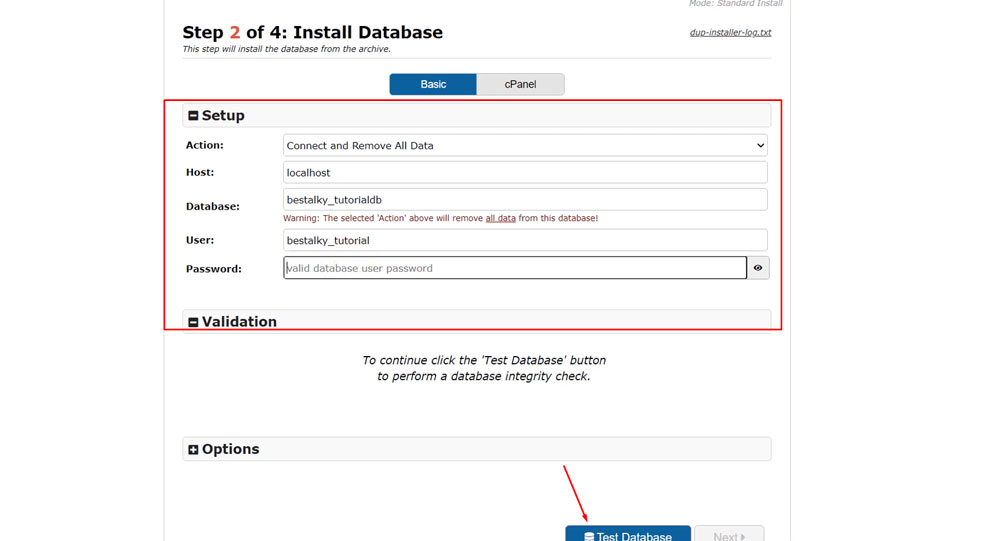
The next page asks you to provide Host, database name, database username, and user password. Provide all the information that we use when creating before. Then click the “Test Database” button.
If your information is correct you will see “Pass” and click the “Next” button. Now it will import the database from the archive file. Then, the duplicator will ask you to update the site URL.
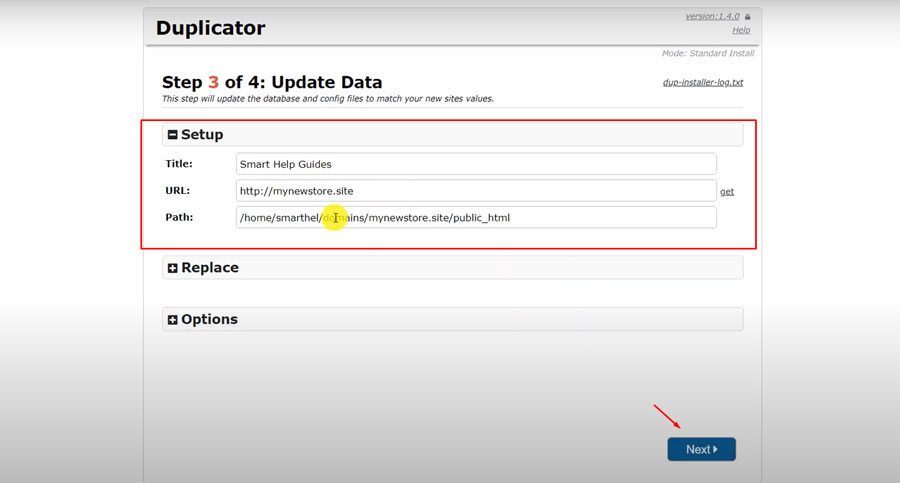
If you are not changing domain names, you don’t need to change anything and click on continue.
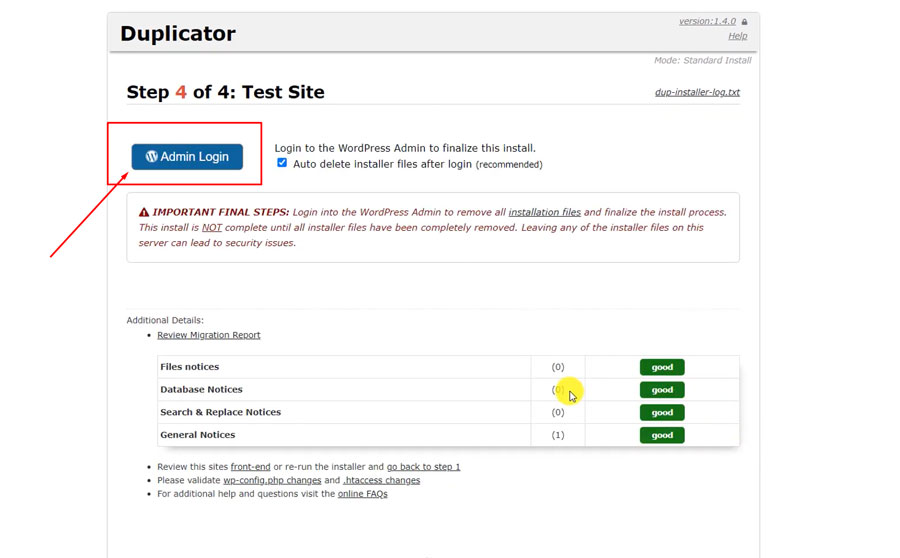
The duplicator displays a login button to log in to the website.
Step 4: Parmalinks update
Now the website migration is complete and we need to complete some steps. Those steps are not mandatory. Sometimes website pages will not show or display a white screen. So we need to update permalinks to fix it. Follow the steps
- Go to WordPress dashboard > settings > permalink
- Select the Permalink structure “Post Name”
- Click on the “Save Changes” button below.
If your site is designed with Elementor page builder, sometimes maybe the background images will not work. To fix this issue, edit the page and select images again that do not show and update it.
Step 5: Replace the old website URL
To replace the old domain name with the new domain from the database, you can use a plugin. Follow the steps
- Log in to your WordPress dashboard.
- Click the plugins button and then add new.
- Search for “Better Search Replace”
- Install and activate the plugin
- Go to the Tools menu and then click on Better Search Replace.
- Select all the tables and search for the old domain name and Replace it with the new domain name.
- Now click Run Search/Replace.
Step 6: Set Up Redirects to New Domain
Since we changed our domain if any user visits the old domain how can we transfer them to the new site? That’s why we need to redirect.
Here I will show you to redirect the old website to the new site via the .htaccess file. Follow the steps:
Go to the old website’s cPanel and website files folder. Delete all the files without the .htacces file. If you do not see the .htaccess file go to cPanel setting at the top right corner. A popup will show and check “Show hidden files” and save it.
Now edit the .htaccess file and paste the code. Replace newdomain.com with your new domain in the code below.
#Options +FollowSymLinks
RewriteEngine on
RewriteRule ^(.*)$ https://www.newdomain.com/$1 [R=301,L]
Once the change is saved, then the visitor automatically redirects your new website.
Step 7: Inform google about the changes
To inform your changes on google you need to replace your website address on google. Before starting you need to make sure the old website has 301 redirects.
Now go to google search console and go to settings. Here you will get the option to add a new site. Now add and validate your site by authentication code.
Conclusion
I covered all the processes and guidelines to move WordPress site to new domain. I hope you will understand and now you can transfer your site anytime.
You can also transfer the website to a new hosting using this process. It is an easy process but if you do not have any knowledge about WordPress and Cpanel, transferring is quite tough for you.
If you face any problem transferring your site comment below.