Hello, Buddies. Hope all of you are doing well. It’s been a very long time and I am not making any new tutorials for you. So I thought it’s my responsibility to run this blog for all of you guys who want to learn WordPress from scratch. So I sit for writing again. This is going to be a very interesting tutorial where I am going to show you how to Install WordPress on localhost. If you don’t know about local hosts or servers. You can check my previous article where I described the localhost.
Here it is What is WordPress Local Host or Server
As We will install WordPress on our Localhost. So We have to install Wamp or Xampp Software first to make our pc as a Fake Server.
How to install WordPress on localhost:
Steps:
- Install server software on Computer
- Run Server Software
- Accessing localhost and Understanding Root directory
- Create MySQL DataBase
- Download WordPress
- Put all the WordPress Files inside our Desired Directory
- Run the installation URL or path
- Put or fill in all the information and install WordPress
Install a Server Software:
There are many Server Software available to turn your PC into a fake server. But in this tutorial, I will show you how to install WordPress on localhost using XAMPP Software to achieve it. First of all, you need to download the software. Here is the download link. You can download it based on your machine. If you use a Windows machine, download it for the Windows version. If you use another platform just download it based on your platform.
Here is the download link for Xampp: Download Here
After downloading it, just install it as like other software.

During Installation, You may ask for some access permissions. Just click on Yes that time and finally click on the finish button.
Run Server(Xampp) Software
Once you will do with installation just run the software. You will get a screen like the one below.
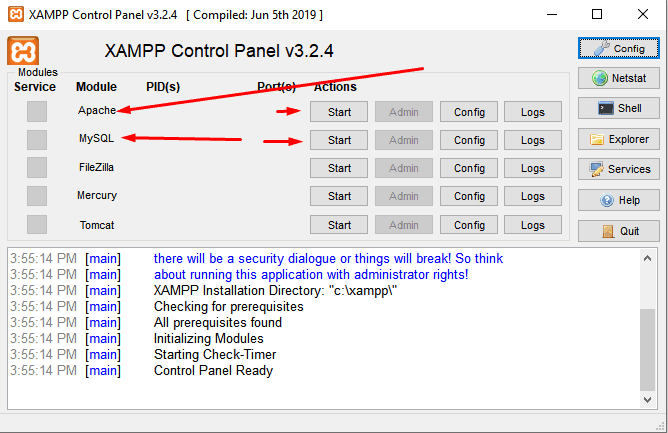
Here you see two modules. One is Apache and another is MySQL. One is a PHP script compiler or module and another is a database. As WordPress has built on PHP language and for the database they used MySQL so we need both to install the WordPress. So what you have to do is, turn on the Apache and MySQL by clicking on the start button pointing at the screenshot. As soon as you click on those buttons on you will get the green sign on the Apache and MySQL text like below.

That means your PC is currently running PHP and MySQL. So You can think about your PC as a local server or a fake server.
Access localhost and understand Root directory
Now You can access your local server. But before that, you have to understand the root Directory. As you have installed the software So you need to know in which folder you should work. And how you can access that folder from the Browser Address bar. Okay, let’s see the directory of XAMPP Software. Simply goto to your C drive or OS Drive and open the XAMPP folder.
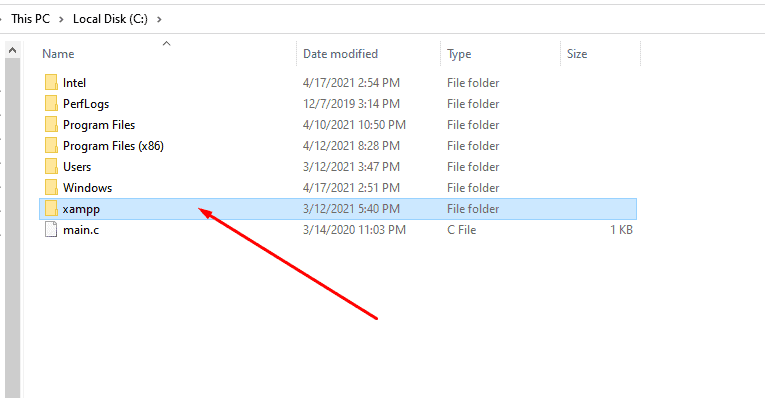
Inside this directory, you will get a bunch of folders and files. But locate only the folder called htdocs. This is the only folder we have to work with for now. You can think of this folder as all your website root directory. That means every single site you will build will be placed inside this folder.
Okay, Now type localhost on your browser address bar. You will get your screen like below.
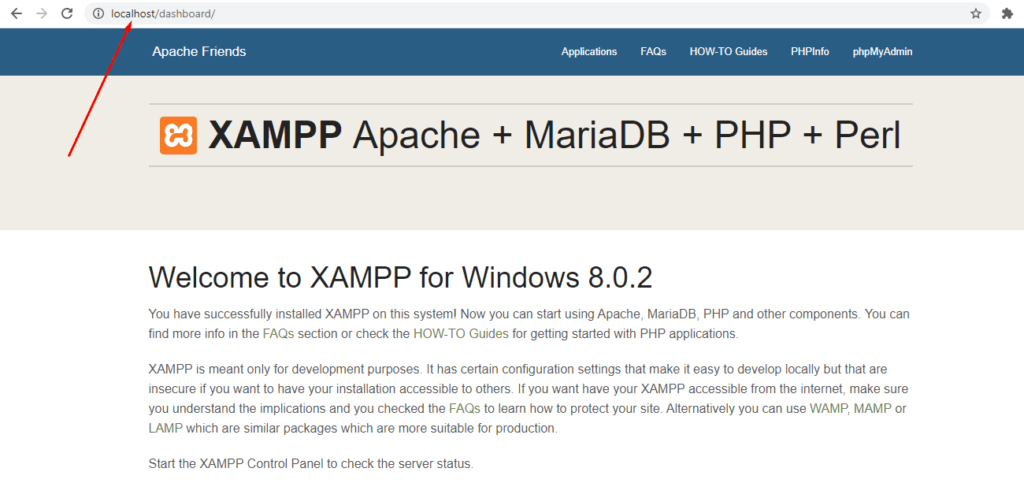
If you look at the address bar carefully you will notice that it does not at localhost anymore. It basically redirected the localhost to a folder called dashboard.
But We don’t need to think about it. Now we have to create our database for a WordPress installation.
Create MySQL DataBase
For creating a new MySQL database you have to go localhost/phpmyadmin URL. Once you will access this URL you will get the MySQL dashboard. By default, PHPMyAdmin does not set any username and password. So for accessing this URL you don’t need to put any username or pass. The default username is root and the password is blank. For the URL mentioned you will get a screen like below.
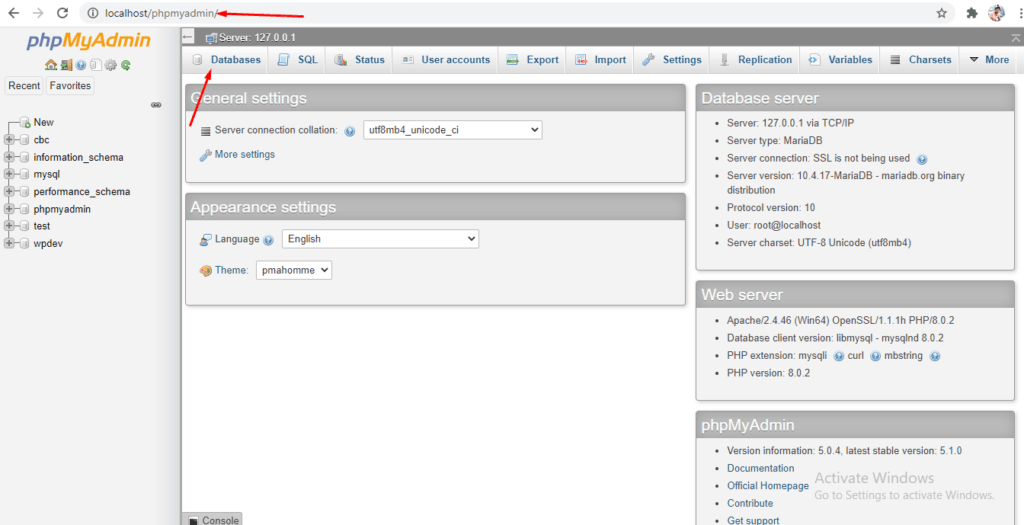
Click on the Database option. And You will get the option to create a fresh database. Just give a database name and click on create. Finally you are all done and you have created a database.
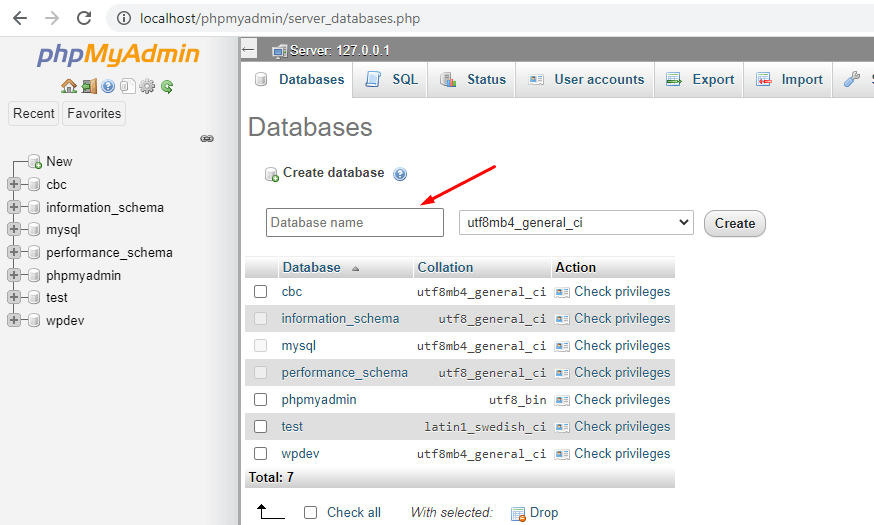
Now Just remember your database name or just make a note of this. Because we have to use this database name for installing WordPress.
Download WordPress
Now you have to download WordPress. No worries, Just download the WordPress from the link below and then extract it.
WordPress download link: Download WordPress. Once you will go with this URL you will not find the download link at the top. So just scroll a bit and you will find the download button.
After completing the download you will get a compressed RAR file. Just open it and extract it at any location. You will get another folder called WordPress. And install this folder you will get all the necessary files and folders. Basically, you need all the files and folders from the WordPress folders to install WordPress.

Put all the WordPress Files inside our Desired Directory
Now You should make a project folder inside htdocs folder and inside your project folder, you have to copy all the WordPress files. Let’s do it.
I made a folder called installed in the docs folder. So I am going to put all the files of WordPress over there.

Once you put all the files inside your desired project folder now you are ready to install your WordPress.
Run the installation directory
Now Access the directory URL like localhost/projectdirectory from the browser address bar. For me, the installation path or project directory path is localhost/installwp
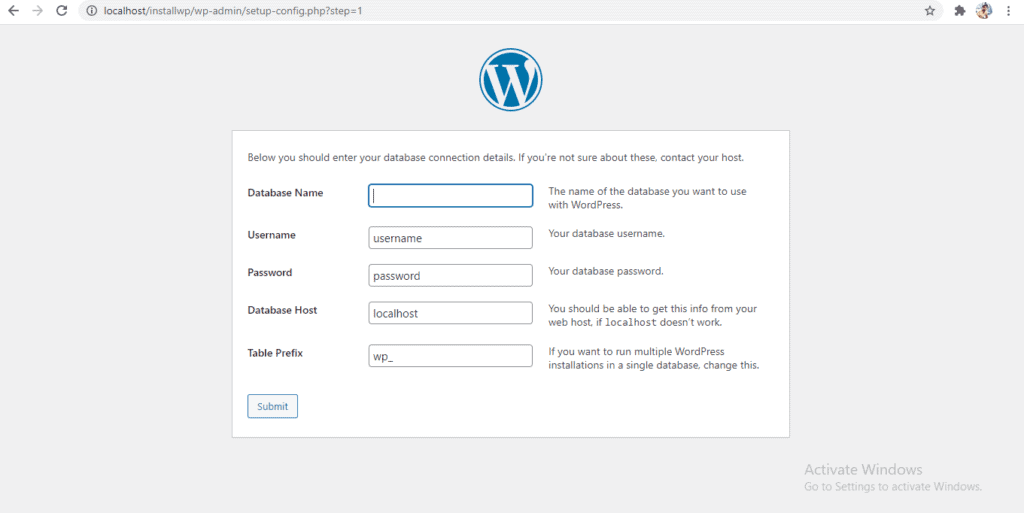
Once you will run this address then you will see the below screen
Put all the information and install WordPress
On this screen, you will see many input files that you need to fill. As WordPress is a web application so it has a database right. So you have to point to the database you have created here. One more thing every database requires a username and password. But you did not face this step because we are working on a local server. So it took the default username as root and password as blank. But it would be a live server then of course you were able to make a new username and pass and bind to that database.
Anyway. Let’s go ahead and complete the rest of the stuff soon :). Once you first input the field, you will see the Database name. So put the database name which you created before. For me it’s installwp.
You just have to put the Database name and then you will find username. Just write root there. And then on the password field, just keep it blank. Then all next input filed will remain the same as it is.

And Now Click on the Submit Button. You will get another page with a button called Run the Installation. Just click on that button. Now you will get a welcome screen where you have to put all the website information.
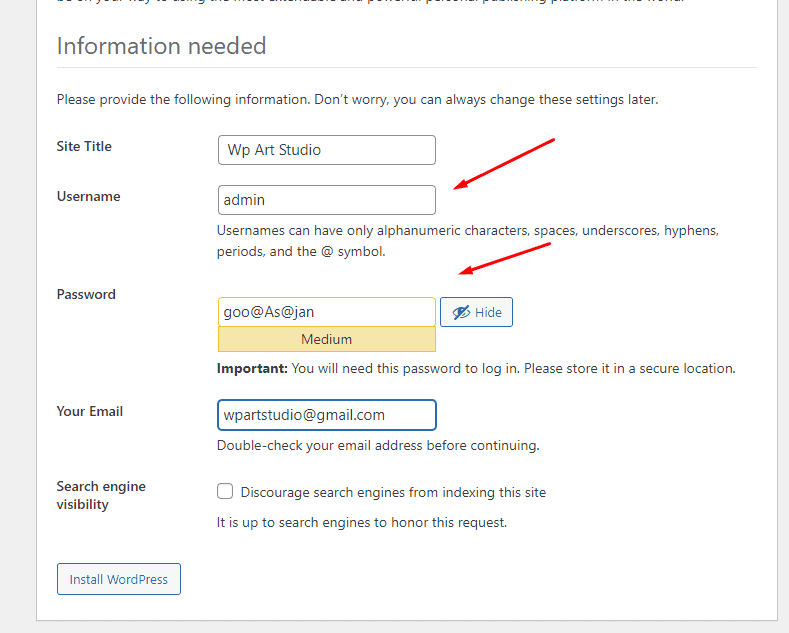
After putting all the information Just click on Install WordPress. It will install WordPress. But please remember your login details. This username and password you have to remember to log in as an admin of this website.
The next step just you have to give your login details again to log in inside the dashboard. After login, you will get your dashboard screen like this

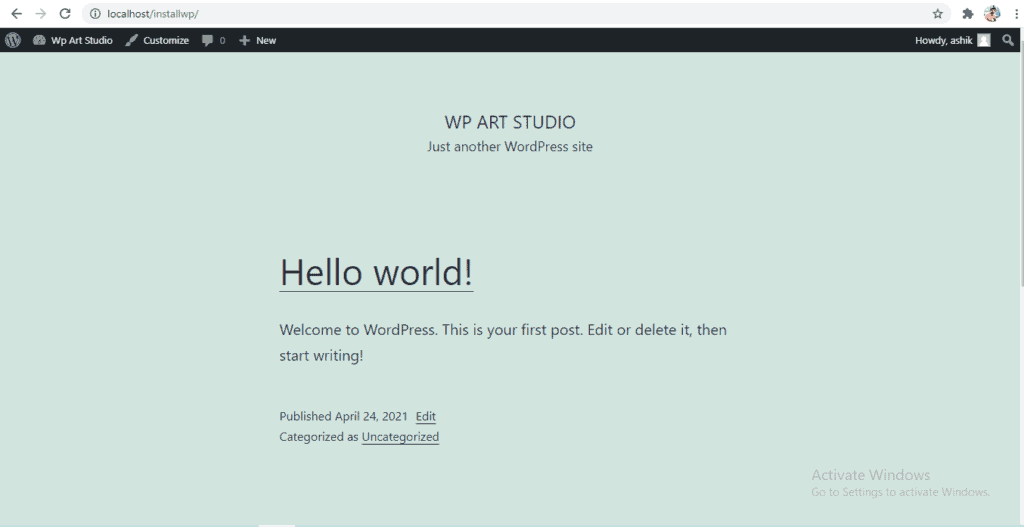
Yahoo!!!! You have finally installed WordPress on a local server. Now for visiting your Website look. You have to just visit the root URL which is localhost/installwp for my case. For you, it will be
localhost/projectfoldername
After accessing the project folder now you will see your first WordPress website look like below.
Okay, All right. This is all for today. I think all of you already got the point of how to install WordPress on Localhost. From the next tutorials, I will let you know inside the dashboard options, all the core functionalities, and how they work. But it will be part by part like a series called WordPress Customization. Still, then stay tuned and stay safe.
If you like my Tutorial you can Like my Facebook page
Facebook: WP Art Studio

