Are you looking for the best guideline on how to install/setup WooCommerce in WordPress to build an e-commerce website?
The popularity of online shopping has been increasing steadily. A survey shows indicating that 33.3% of consumers now prefer to purchase their essential items online. For this, many people are willing to start a business online.
In the past, creating an online shop was a complex and expensive process, often requiring a significant investment of time and resources. But at this time, building an E-commerce shop is easy and affordable.
Using WordPress and WooCommerce, anyone can create their own online store quickly at a low cost. If you have some technical knowledge and proper guideline, it is very easy for you. You do not need any coding knowledge.
So, if you’re looking to launch your own online shop, this article is very helpful to you. Here I will discuss step by step how to install/setup WooCommerce in WordPress to build an e-commerce website.
We already publish an article on how to build a website using WordPress. In this tutorial, I will start by installing WooCommerce. So, I will recommend you check the article on how to build a website using WordPress first. But, If you know how to build a WordPress website, keep reading this article.
What is WooCommerce Plugin?
WooCommerce is a powerful plugin designed for WordPress that allows you to set up an online store with ease. This plugin is free and open-source so you can use it to sell products and services directly from your website. It provides a range of features that make it an ideal choice for building online stores, including inventory management, shipping options, payment gateways, and tax settings.
WooCommerce is easy to install and use, even for those with limited technical knowledge. It comes with an intuitive interface and a user-friendly dashboard, making it simple to manage your online store and monitor your sales. Additionally, it integrates seamlessly with a wide range of third-party plugins, including marketing and analytics tools, to help you grow your business.
How to Install and Set Up WooCommerce in WordPress?
Installing or setting up WooCommerce in a WordPress site is not hard. You can easily install WooCommerce on a new website or existing website without any coding knowledge. Here I will show you the process step by step from installation to configuration.
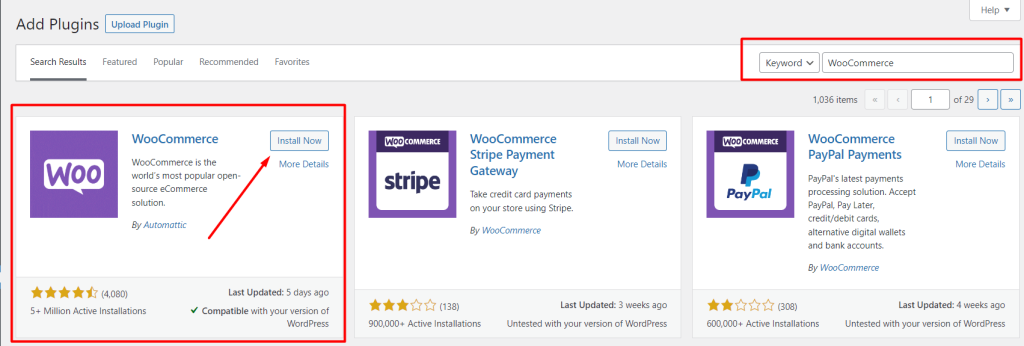
Step 1: Install WooCommerce Plugin.
To add e-commerce functionality to your existing website, first, you need to install WooCommerce. You will get this plugin on the WordPress repository for free. To Install WooCommerce, Go to WordPress Dashboard → Plugins → Add New. You will be redirected to the plugin page. Now search WooCommerce at the top right. Click on Install and wait a few seconds to get the Activate button and Activate it.
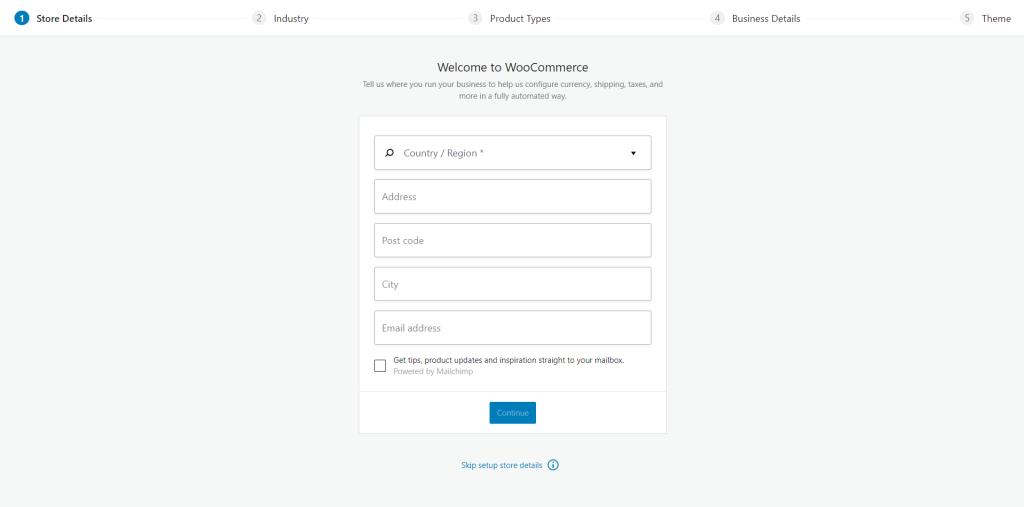
Step 2: WooCommerce Setup Wizard
After activating the plugin, you will be automatically redirected to the Setup wizard where you will find some necessary steps to set up your store to start selling. You just need to provide some important details about your store such as where your store is based, what industry, which products, etc. Now provide the store details and click on continue.
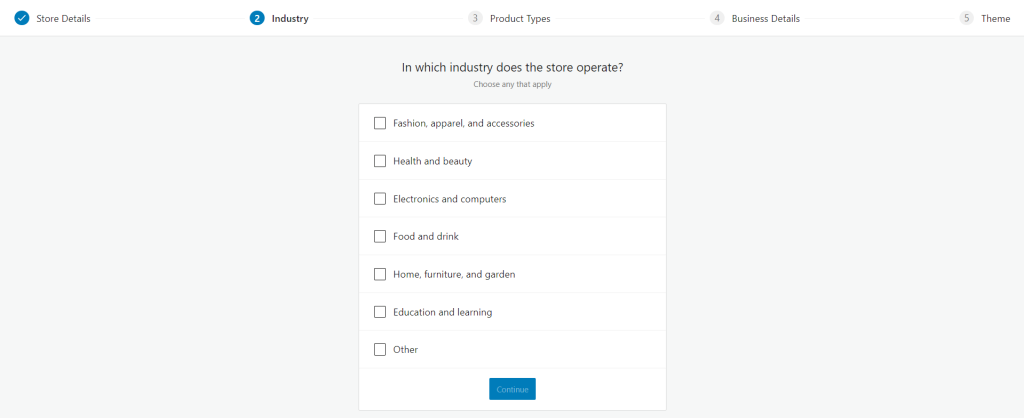
Step 3: Choose the Industry
In this step, you need to select the Industry in which your store operates. Now click on the Continue button.
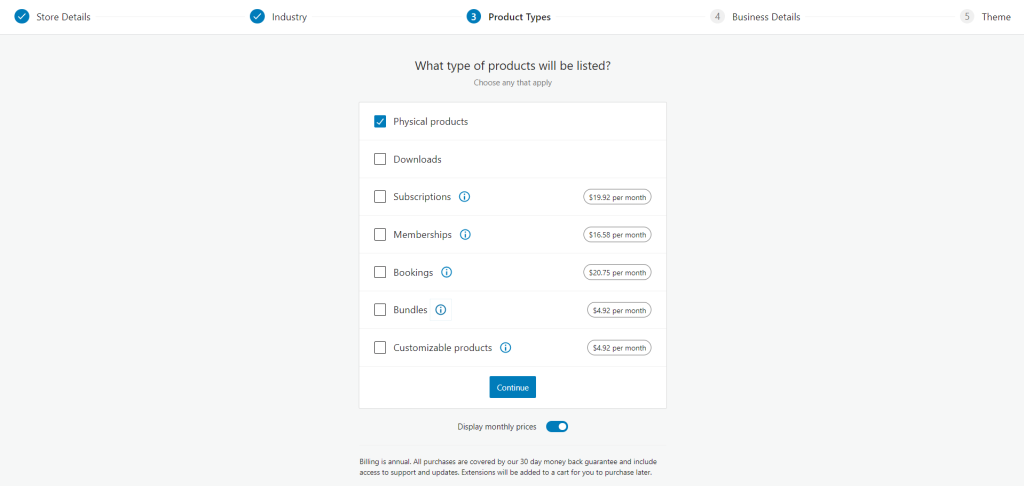
Step 4: Select the product type
Here you need to choose the product types that you want to sell in your shop. There are two product types available: physical products and downloadable products. You can also add subscriptions, membership, booking, etc for extra earnings.
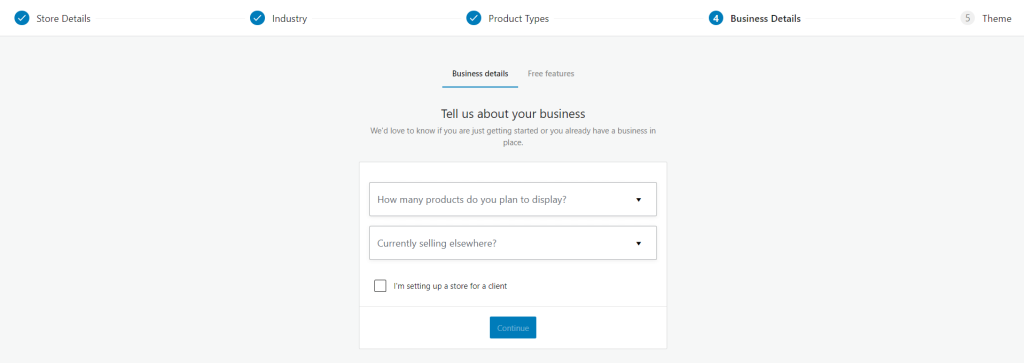
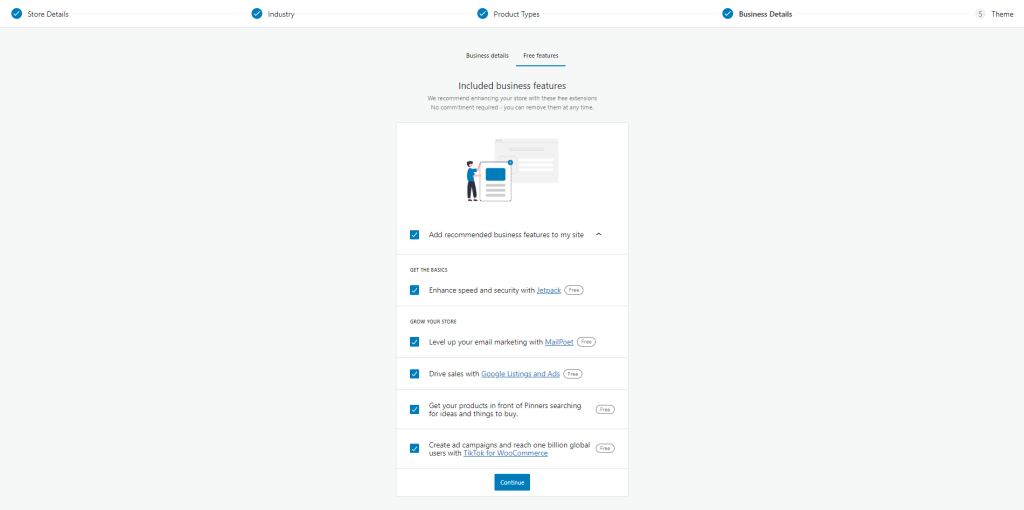
Step 5: Provide Business details
This step asks you about your business details such as how many products you have and where you are currently selling. So, provide the information and click on Continue.
Step 6: Choose a theme
Now you need to select a theme to build your store. You will find free and premium themes. You can use any of them. If you already installed a theme for your store you can simply skip this step.

We already published an article about the best free theme for any online shop. If you want to use a premium theme, Check this article about the best lightweight theme for WordPress e-commerce sites.
So our WooCommerce setup successfully completed and you will be redirected to another page to start selling. Here you need to add a product, payment method, tax rates, etc, and more. Before moving to those steps, let’s introduce with WooCommerce products tab.
Go to Dashboard → Products
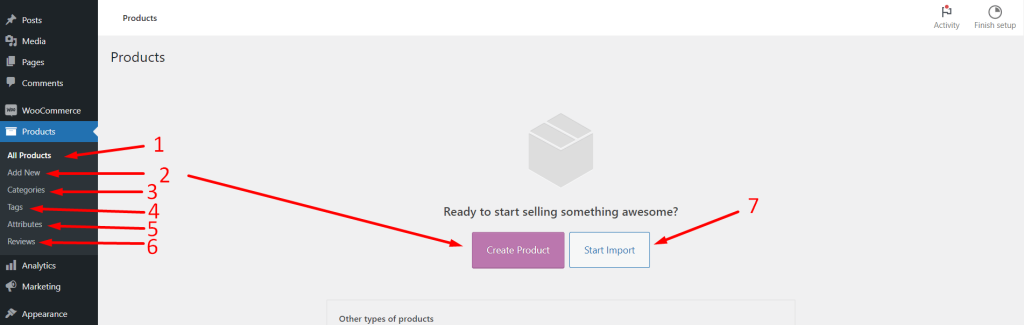
(1) All Products: In this tab, you can see all the products easily. You can also manage, edit, or delete any product from here.
(2) Add New: This tab allows you to add new products to your store. I will show you how to add products later.
(3) Categories: From the Categories tab, you can add, manage, delete, or edit any product category easily.
(4) Tags: Tags tab allows you to add, edit, or delete any product tag.
(5) Attributes: From this tab, you can add any attributes like size, color, brand, weight, etc. After adding an attribute, you need to configure terms. You can also delete or edit any attributes from here.
(6) Reviews: In the reviews tab, you can see all the product reviews that customers submitted. You can delete, edit or approve any review.
(7) Import Product: By clicking on Start import, you can easily import products from other sites by a CSV file.
Adding a product to the WooCommerce website
WooCommerce allows you to add products to your website easily. So let’s see how to add products:
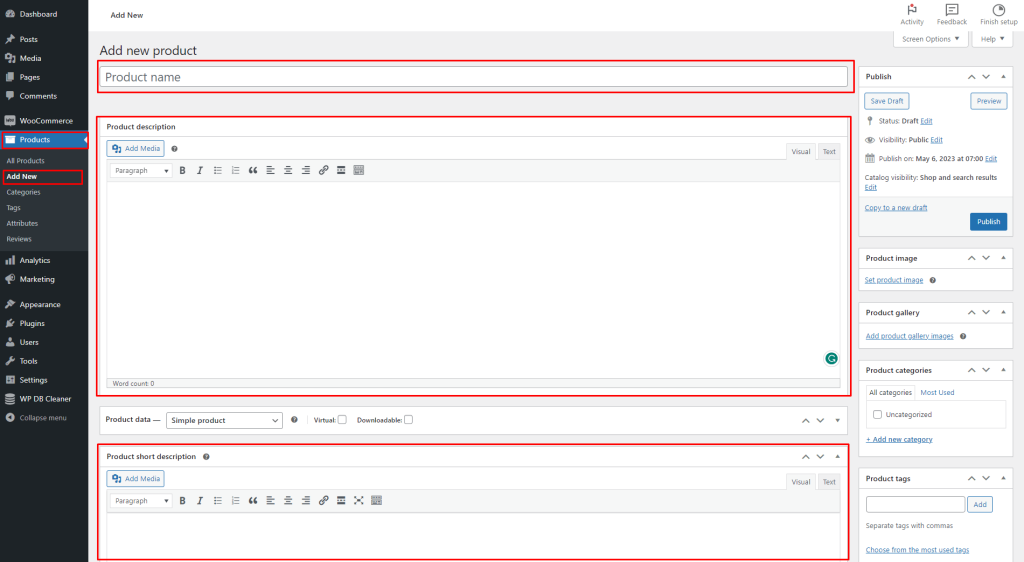
Go to Dashboard → Products → Add New. Here you will see fields to add product names, product descriptions, and product short descriptions.
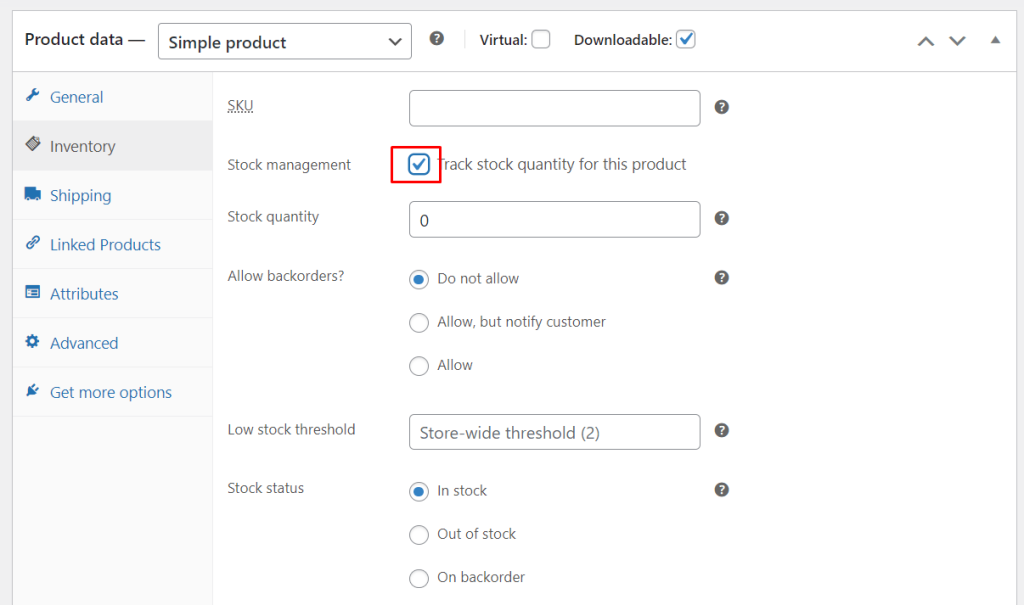
In the Product Data tab, you will get fields to add a product price and sale price. If your product is downloadable, you need to tick the downloadable option and some fields appear to add the downloadable file, download limit, and download expiry time.

From the Inventory tab, you can manage product SKU and Product quantity.
The shipping tab allows you to add product or parcel weight and dimensions. You can also add shipping class from here.
Upsells and Cross-sells are another plus-point to get more sales during checkout. You can easily add upsells and cross-sells products from the linked products tab.

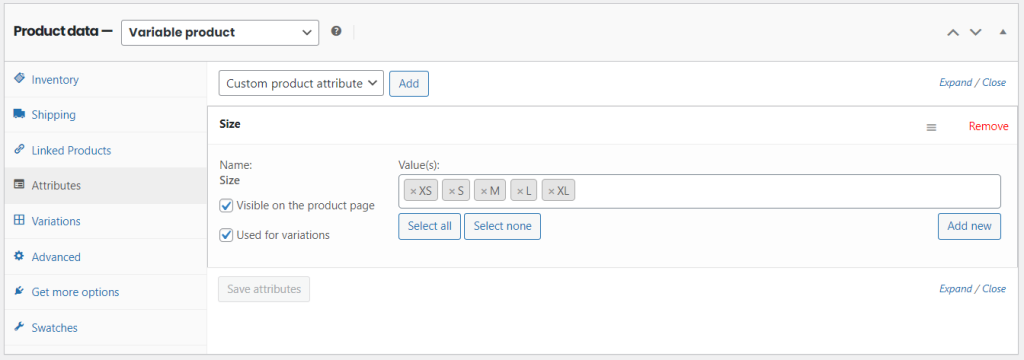
From the attributes tab, you can create new attributes or select existing attributes to add size, color, brand, etc.
On the right side of the page, you will get fields to add product images, product gallery images, categories, and tags. So you can easily add them without any hassle. After adding, click on the Publish button to publish the product.

So we successfully add a simple product to our WooCommerce website.
Adding payment methods
Adding a payment method is very important to collect payments from customers online. WooCommerce allows you to add multiple payment methods easily. To add a payment method go to Dashboard → WooCommerce → Settings → Payments. Now enable the method that you want to use to receive payment and Click on the finish setup button to link the account. Then click on save changes.

Setting up Tax in WooCommerce Store
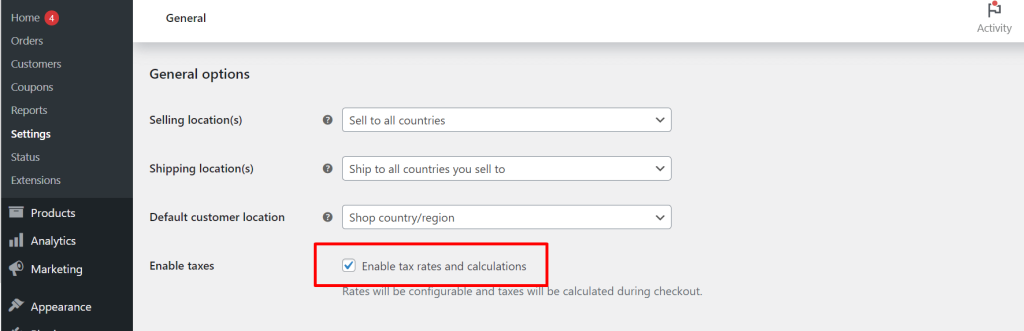
Now we need to set up WooCommerce tax. Normally, you can’t find the tax tab to set up. You need to enable it from the general tab. To enable the tax tab, go to WooCommerce → Settings → General and enable taxes features and click on the Save Changes button.
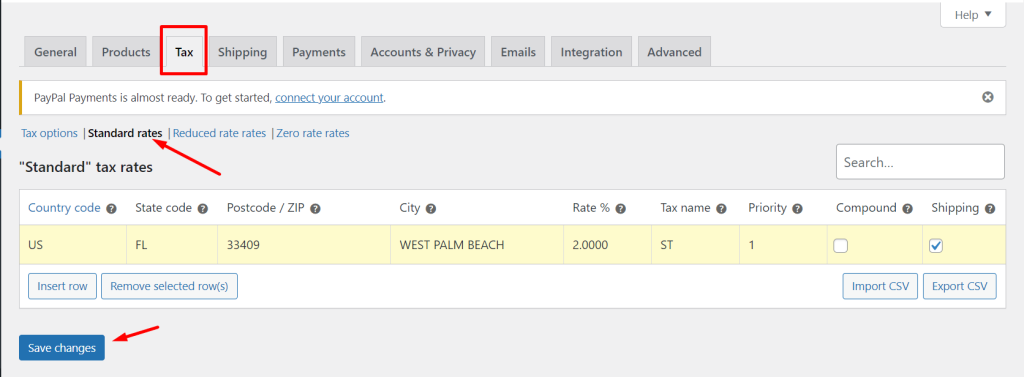
Now you will get the tax tab and go to the standard rates option to add tax. You can also import tax from a CSV file.
Add shipping method
Adding a shipping method is important to collect shipping costs from customers. You can add different shipping costs for different places. To add a shipping zone go to WooCommerce → Settings → Shipping → Shipping zones → Add shipping zone.
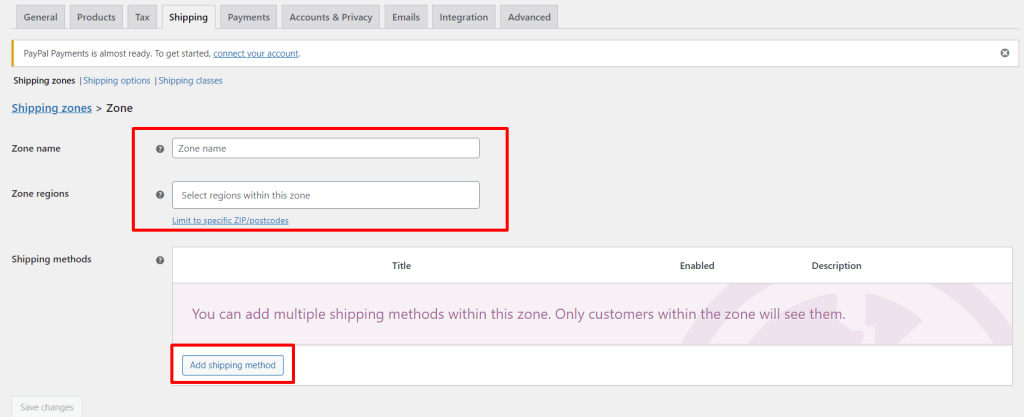
Now you need to provide Zone Name and select Zone regions. To add a shipping method you will get a button and click on it. You will get a popup to select a shipping method.
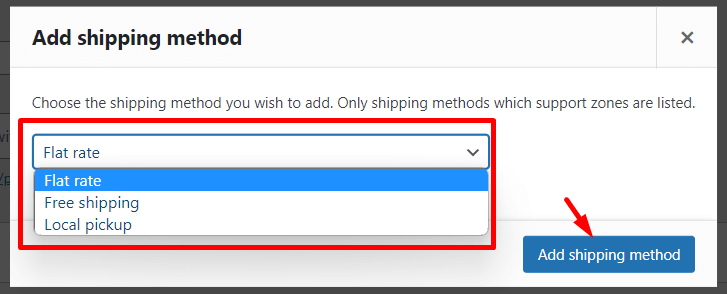
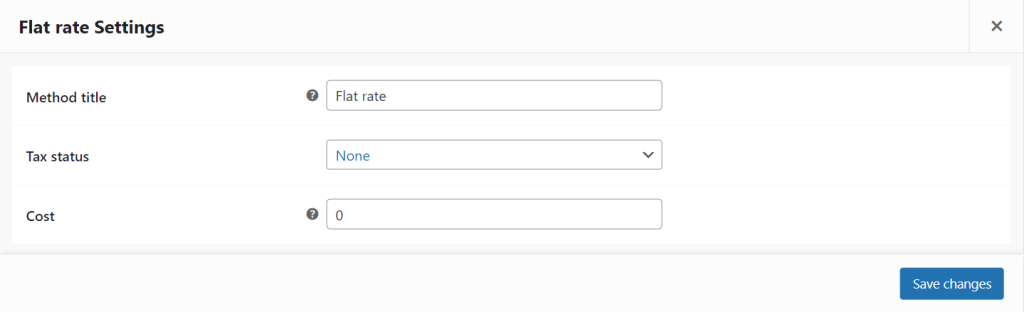
After selecting the shipping method, click on edit to change the method title, tax status, and add the shipping cost. Then click on Save Changes. You can also enable free shipping with different conditions.
Customize your WooCommerce Store
Above we just configured a few settings, but WooCommerce has huge functionality. To manage your website perfectly, you must know about other functionality. You will get lots of tabs with more options. So now I will introduce all the tabs shortly.
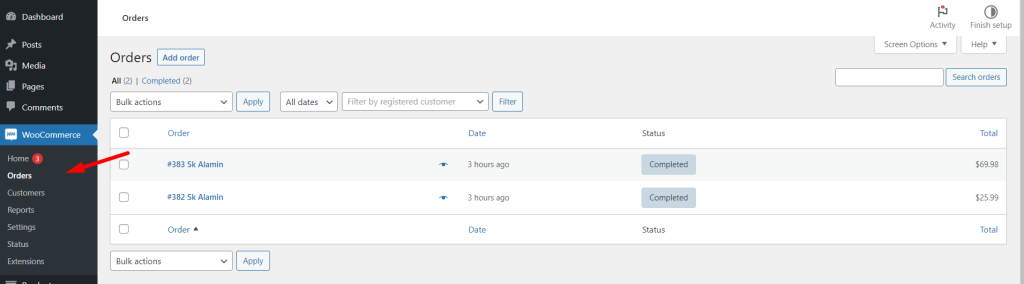
Orders
To access the order tab, go to WooCommerce → Order. From here you can able to see all the orders that are pending or completed. This tab also allows you to edit or update order status easily.
Customers
Go to WooCommerce → Customers to access this tab. This tab shows you all the customers who purchased products from your website. It also displays customer information like name, email, orders, total spend, country, etc. If you want, you can edit any customer’s details.

Reports
WooCommerce is amazing because it has many interesting features. The Reports is one of them, also allows you to view all sales, orders, and shipping costs via charts and graphs. You can also filter time to see specific time reports. To see reports go to WooCommerce → Reports.

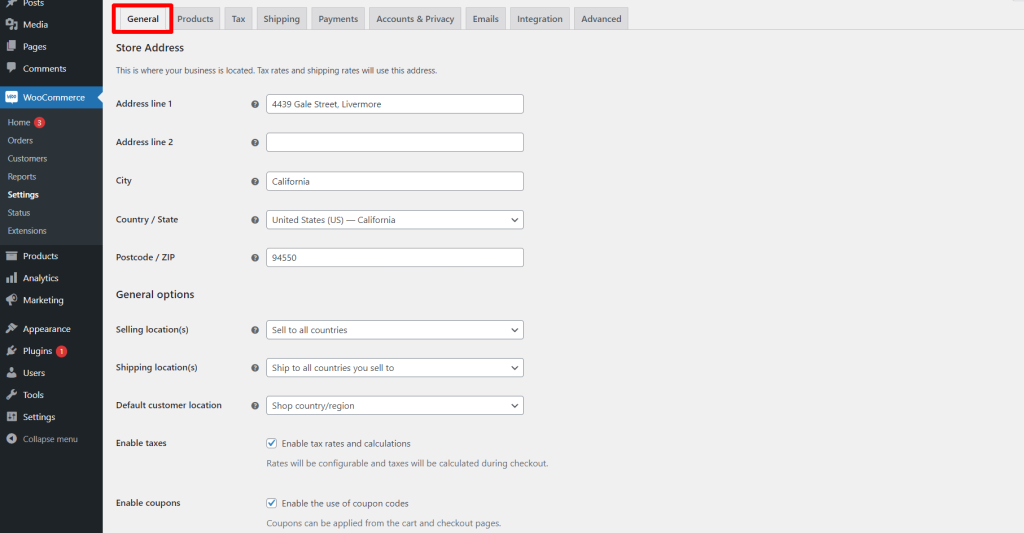
Settings
The WooCommerce settings contain lot’s of tabs with more settings options. This is an important option to manage your site.
In General, you can get fields to set up your store address, shipping and selling area, currency, etc. After providing the information you must click on save changes.
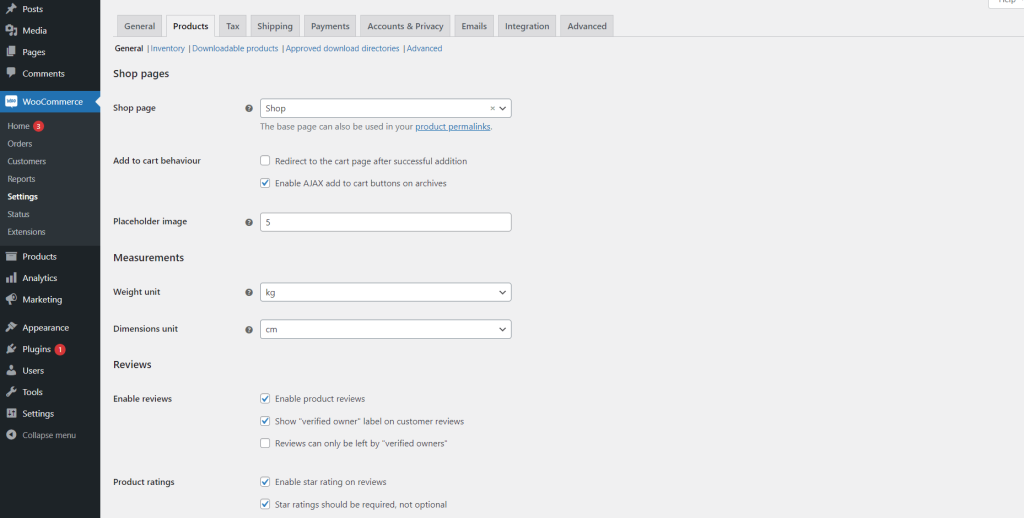
From the product tab under the setting, you can select the shop page, change the cart behavior, measurements, review, ratings, etc.
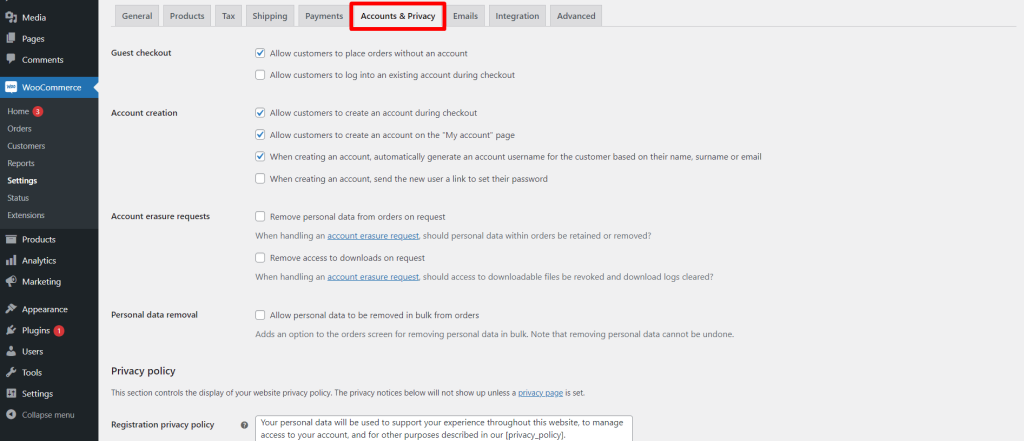
The account and Privacy tab allows you to manage account creation, personal data removal, and checkout options.
Using the Email tab, you can change all the emails (such as The new order, Cancelled order, Failed order, Completed order email, etc.) text, format, templates, etc. This option also allows you to change the header image, email color, sender email, etc. too.

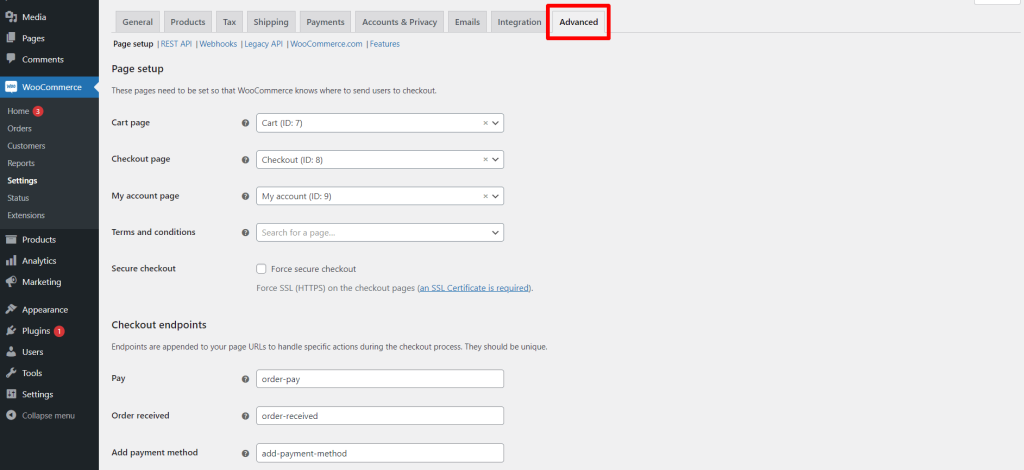
From the Advanced tab, you can set up your WooCommerce pages like Checkout, My Account, Cart page, etc. This tab also allows you to change account and checkout endpoints but you do not need to change those options.
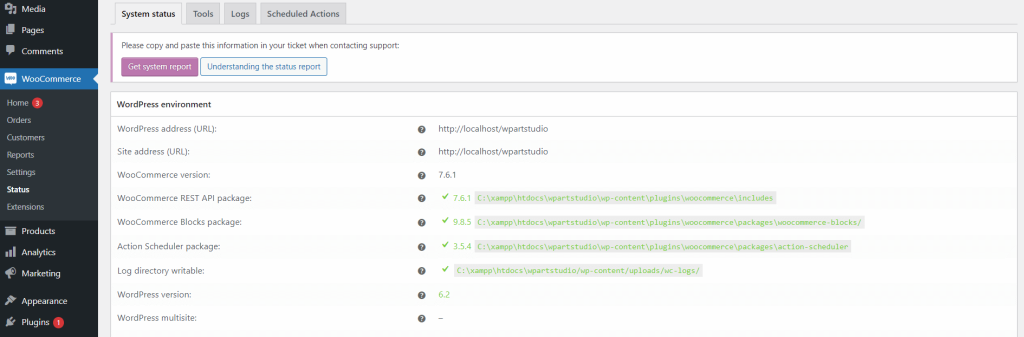
Status
The Status tab shows you an overview of your website, database, server, themes, plugins, etc, and more. You can also log and schedule actions from here and also manage it.
Extensions
WooCommerce offers lot’s of free and premium extensions to make your site more advanced and professional. You can easily purchase or install extensions from the Extensions tab.

Analytics
The Analytics tab comes with more sales-related reports. You can easily see your sales report individually like Products, Revenue, Orders, Categories, and much more. In a word, this feature is really amazing. You can access this tab from Dashboard → Analytics.

For website instance, you need to design your website to display products. If you are unable to design a website, you can import a demo template. Most of the theme offers stunning designed templates and you can easily import them with a click. Check the article to know how to import a demo template.
Conclusion
In conclusion, setting up WooCommerce can be a powerful tool for those looking to sell products or services online. As an open-source platform, it provides a flexible and customizable way to create an online store that meets your specific needs.
In this article, I have covered the necessary steps to install and set up WooCommerce, including the requirements needed, the installation process, and basic configurations, and also provide a complete overview to get your store up and running.
By following these steps, you should have a good understanding of how to get started with WooCommerce and begin selling your products online. In a word, WooCommerce is an excellent option for anyone looking to launch an online store.
Don’t forget to leave a comment if you have any questions. Share the problem that you face on your WordPress website, We will publish the article depending on the problem.