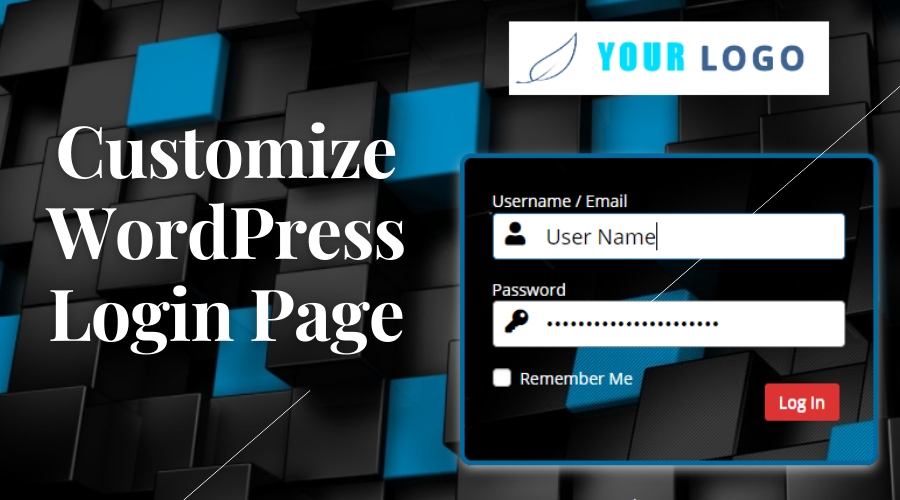
WordPress is one of the most powerful CMS which is completely customizable. We can customize every single design of WordPress. And this is why it’s so powerful. When we think about the WordPress login page, a simple Classic WordPress logo-based form we see. How about customize your WordPress login page? Isn’t it amazing? Today I will show you how to customize WordPress login page completely. So without further, let’s begin.
To achieve WordPress login page customization we will use a plugin called Admin Custom Login. There are so many plugins available but I found it very easy to use and you can customize almost everything you need by using this plugin. So here I am going to show you all the steps how you can customize your login page
Also read: How to create image gallery in WordPress website
Step 1: Install the plugin
Go to your WordPress Dashboard. Then go to the plugins option and click on Add New. And you will find the search bar on the right corner. Just type Admin custom login. I think you found it. Just install that plugin and you are all set.
Step 2: Customize the AC login plugin
Now you just have to customize this plugin based on your needs. By default, it will set a custom background and a custom default logo once you will set the Admin custom login status “Enable”. You will find it, if you just scroll a bit down. And finally, It will just set a default login page.
But We need to customize the login page based on our needs right? So what kind of customization is basically possible by the plugin? Let me show you a list.
What is possible to customize:
- Custom background image.
- Custom Background Color
- Custom Background Slider
- Custom Logo
- Google re-Captcha
- Social icon list implementation
- Logo Customization option
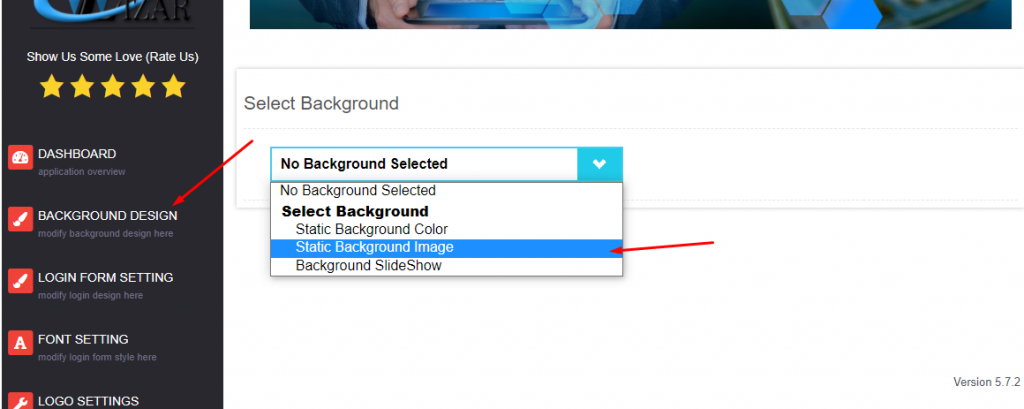
Setting a custom background
You can use three types of background. You can use a background color, You can use background image or you can use background slider. For using the background image you have to just go to the Background Design option from the Admin custom login dashboard. Then you have to choose the option named static background image.
After that, you have to set the background image URL. You have to collect the image URL form the media library. Just upload the background image you want to set as the background image. Then click on the image, finally you will find the image URL on the right hand side. Copy that URL and paste it on the image URL path.

You are done. Now the background image has been set to your login page.
Custom Logo Setup
Setting up a custom logo is also easy. Just find the option named Logo setting. You will find another option like logo form setting. But you should select only the Logo setting. Once you select the logo setting you will get the URL option. Just like before, upload your logo first then copy the LOGO link and paste here.
You will get some other options as well like Logo Width, Logo Height, Logo image link, Logo Title etc. So you can customize everything based on your needs. Let’s go to our next customization.
Social Icon implementation
You Can implement a social icon list as well. To achieve this just click on the Social Setting. And you will get many options based on your needs. First of all you have to choose the placement option. Do you want to show those icons inside the form? If yes then you have to choose the inner option from the Enable social icons dropdown. If you want to show outside of the form then you have to choose the Outer option. If you want to show those icons on both sides then you have to choose Both options.

Then you will get many important options like Social media icon links. Then social media icon color, social media icon color on hover etc. Just look around every option and set those perfectly based on your needs. So your social setting has been set as well. Now The last option is Google captcha. Let’s work on it.
Setting up google re-Captcha:
This option is a bit technical and a bit harder than all previous options. Don’t worry I am going to show you how you can set it. First of all select the Google captcha option from the AC Login Dashboard. Once you select it you will get many options. For the very first thing you have to enable it first. You will get this option named Captcha Display. Just Select enable.

After Enabling it, You have to choose the catch version. Basically, there are two versions of the captcha. Once is Version 2 which is known as Google Captcha V2 and another is Version 3 which is known as Google Captcha V3. I personally prefer V3 because it’s better than the V2.
So to implement this, first of all, you have to go https://www.google.com/recaptcha this link. Just open a new tab and visit the link mentioned. At the top, you will see the V3 admin console. Simple click on there. On the top, you will get a plus (+) sign which is for adding a new site. Just click on there.
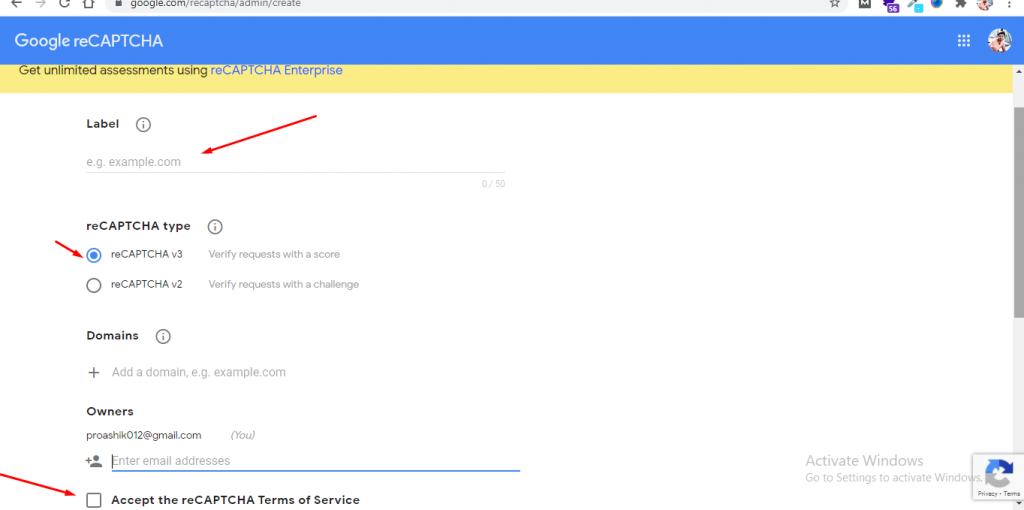
You will get many options here. Just simply label your website name and then select re-Captcha V3. Now Add your domain name check the Accept the re-CAPTCHA Terms of Service and finally click on the submit button. You are all set now. The re-Captcha has been set to your Admin custom login page and your site is now protected by the Google re-Captcha as well.
That’s all for today. how you guys like it. If so please share this article and if you want to get updated content please subscribe to this blog using the below form.
Here is the list of my previous articles. If you want you can read this as well.
5 Best Social Media Plugins for WordPress
WordPress Dashboard Introduction
Why you should learn WordPress in 2021
What is a local server or a localhost
How to Install WordPress on Localhost